Zoom Integration: Live Captions and Translation for Zoom Meetings
Overview
This integration brings Maestra live captions to Zoom through the Maestra Live - Transcription & Translation app on the Zoom App Marketplace. Install it once and link your Maestra account, then start real-time transcription and translation from right inside any Zoom meeting.
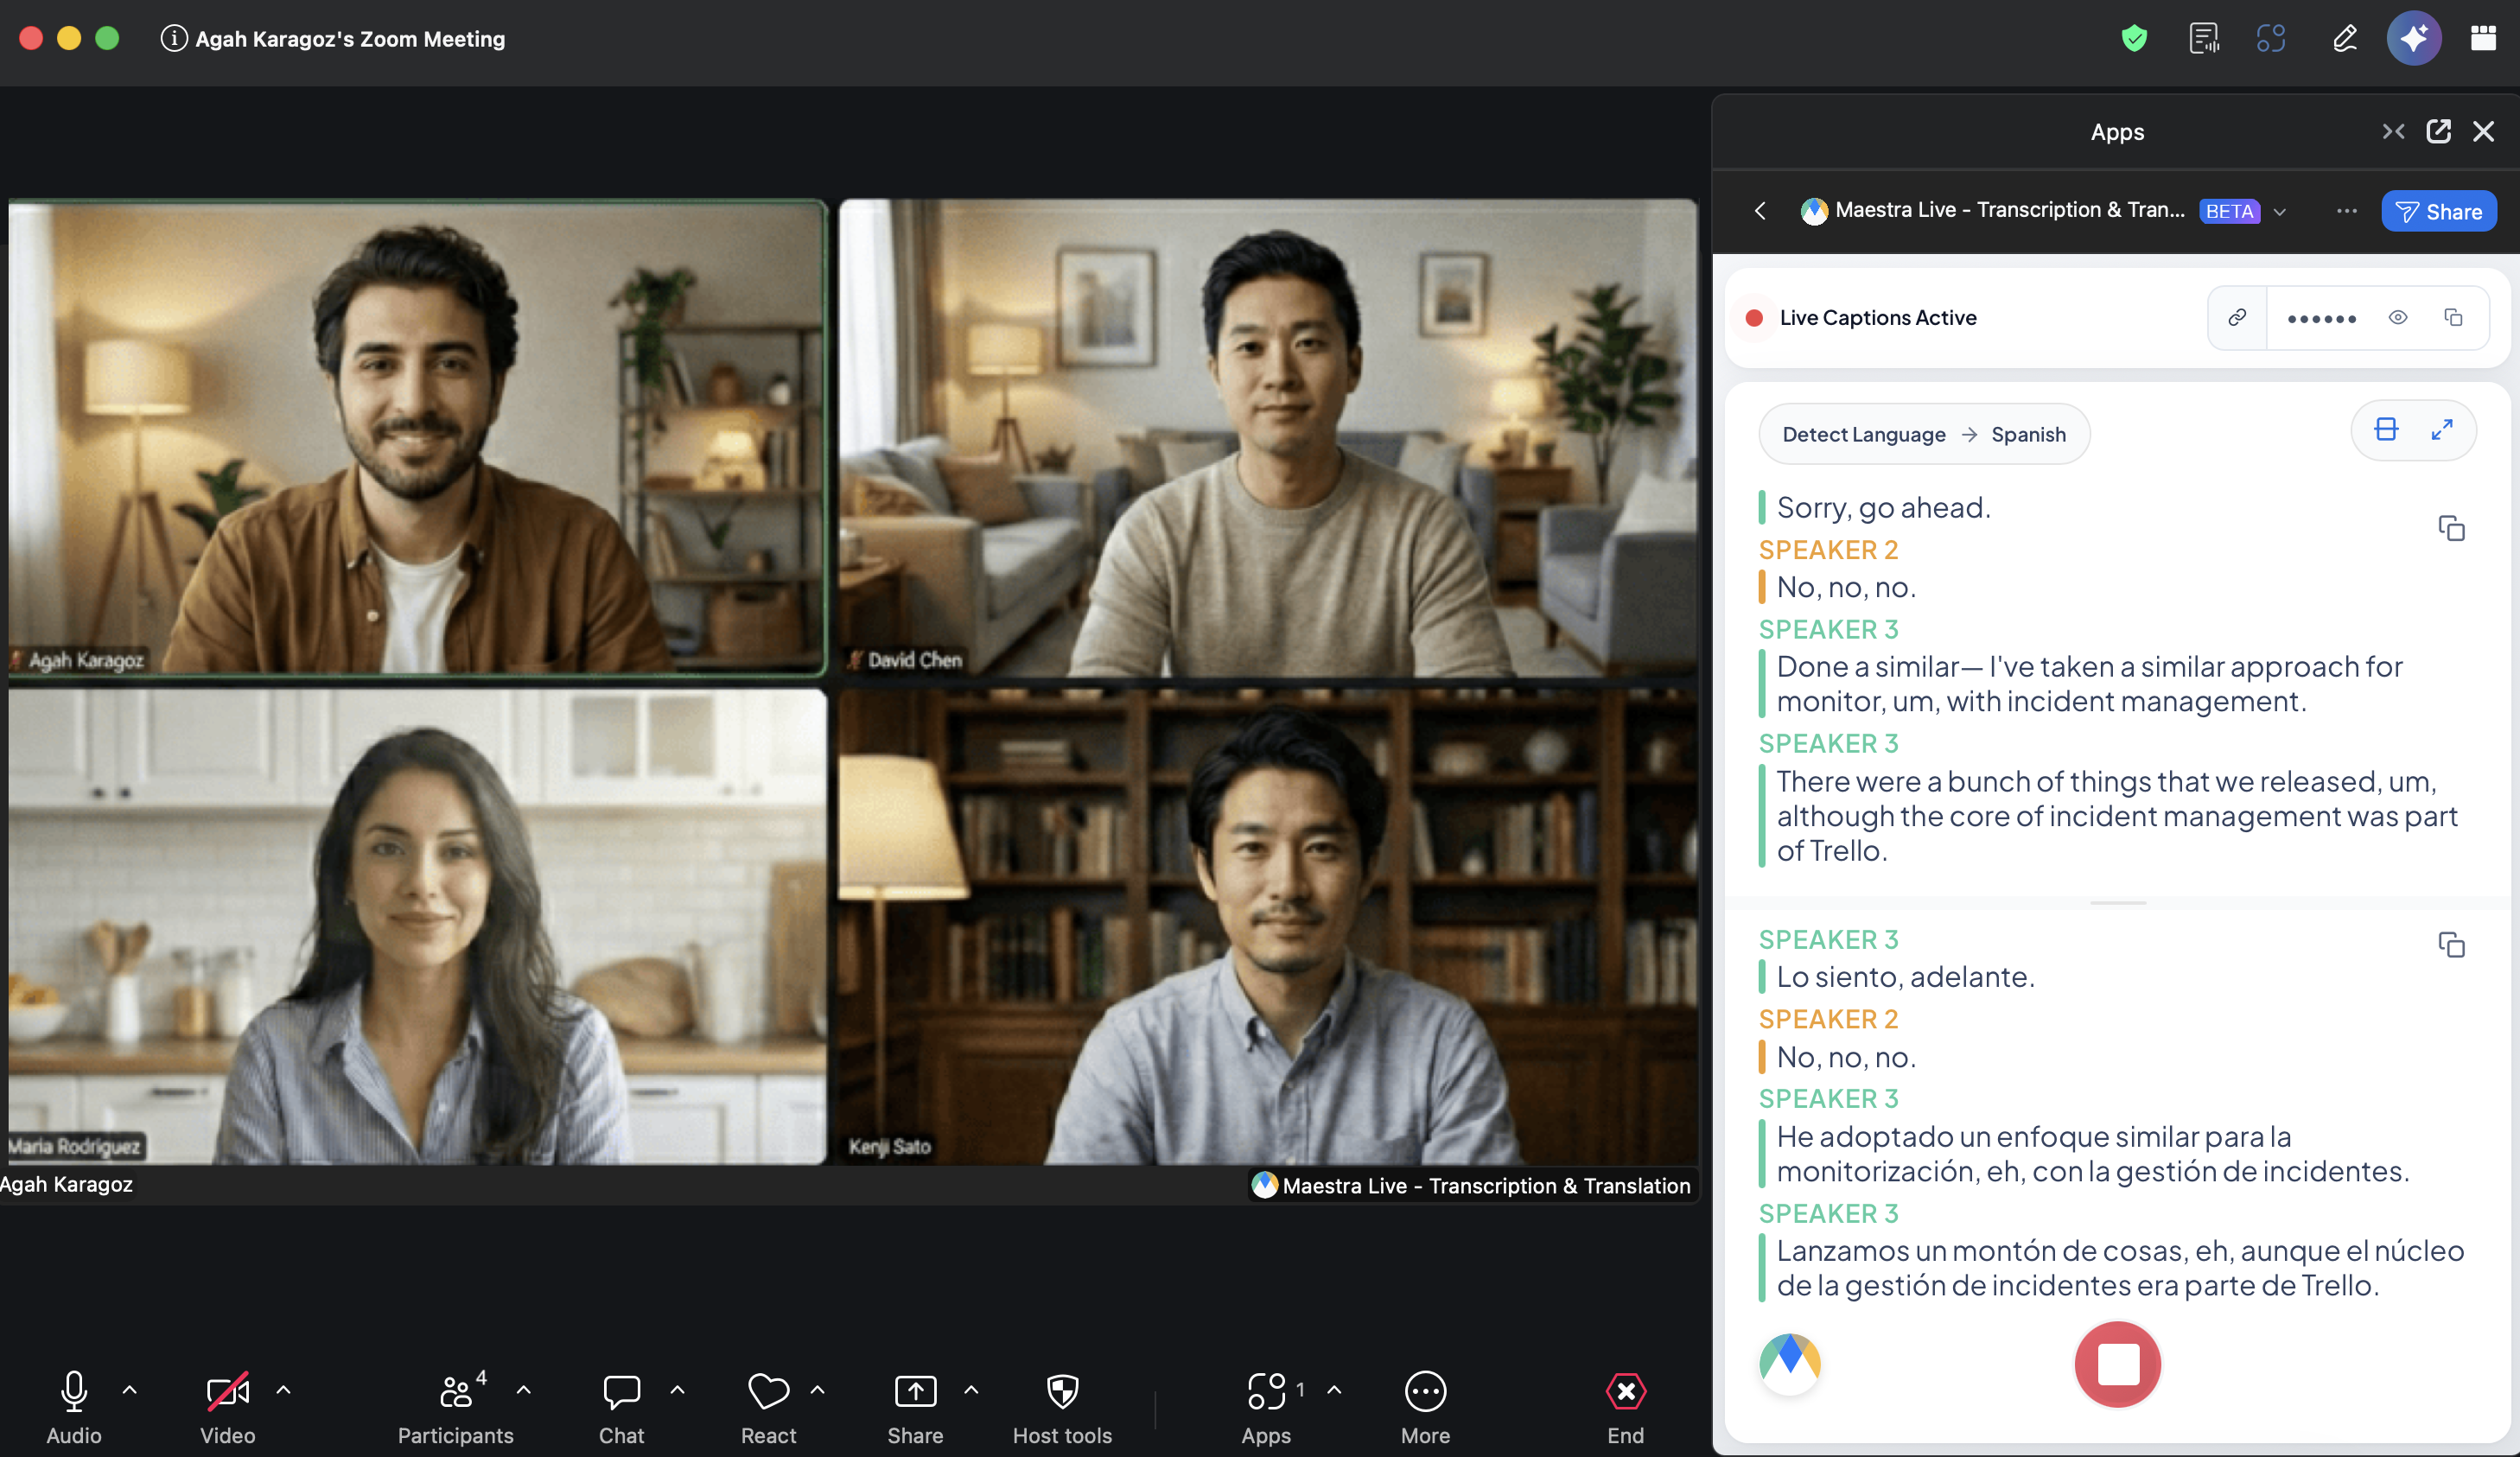
The app uses Zoom's Real-Time Media Streams (RTMS) to listen to the meeting audio. Captions appear in the app panel right inside the meeting, and Maestra posts a join link into the meeting chat so everyone else can follow along on their own device, in the language they choose. Viewers don't need a Maestra account.
How it works
There are three steps:
- Step 1: Install the Maestra app from the Zoom App Marketplace and link your Maestra account. You only do this once.
- Step 2: In your meeting, open the app, pick your languages, and start live captions.
- Step 3: Share the caption link with attendees. Maestra posts it into the meeting chat for you.
1. Install the Maestra app from the Zoom App Marketplace
You only need to do this once, from your browser.
Open the app in the Zoom App Marketplace
Open the Maestra Live - Transcription & Translation listing, or go to marketplace.zoom.us and search for Maestra Live.
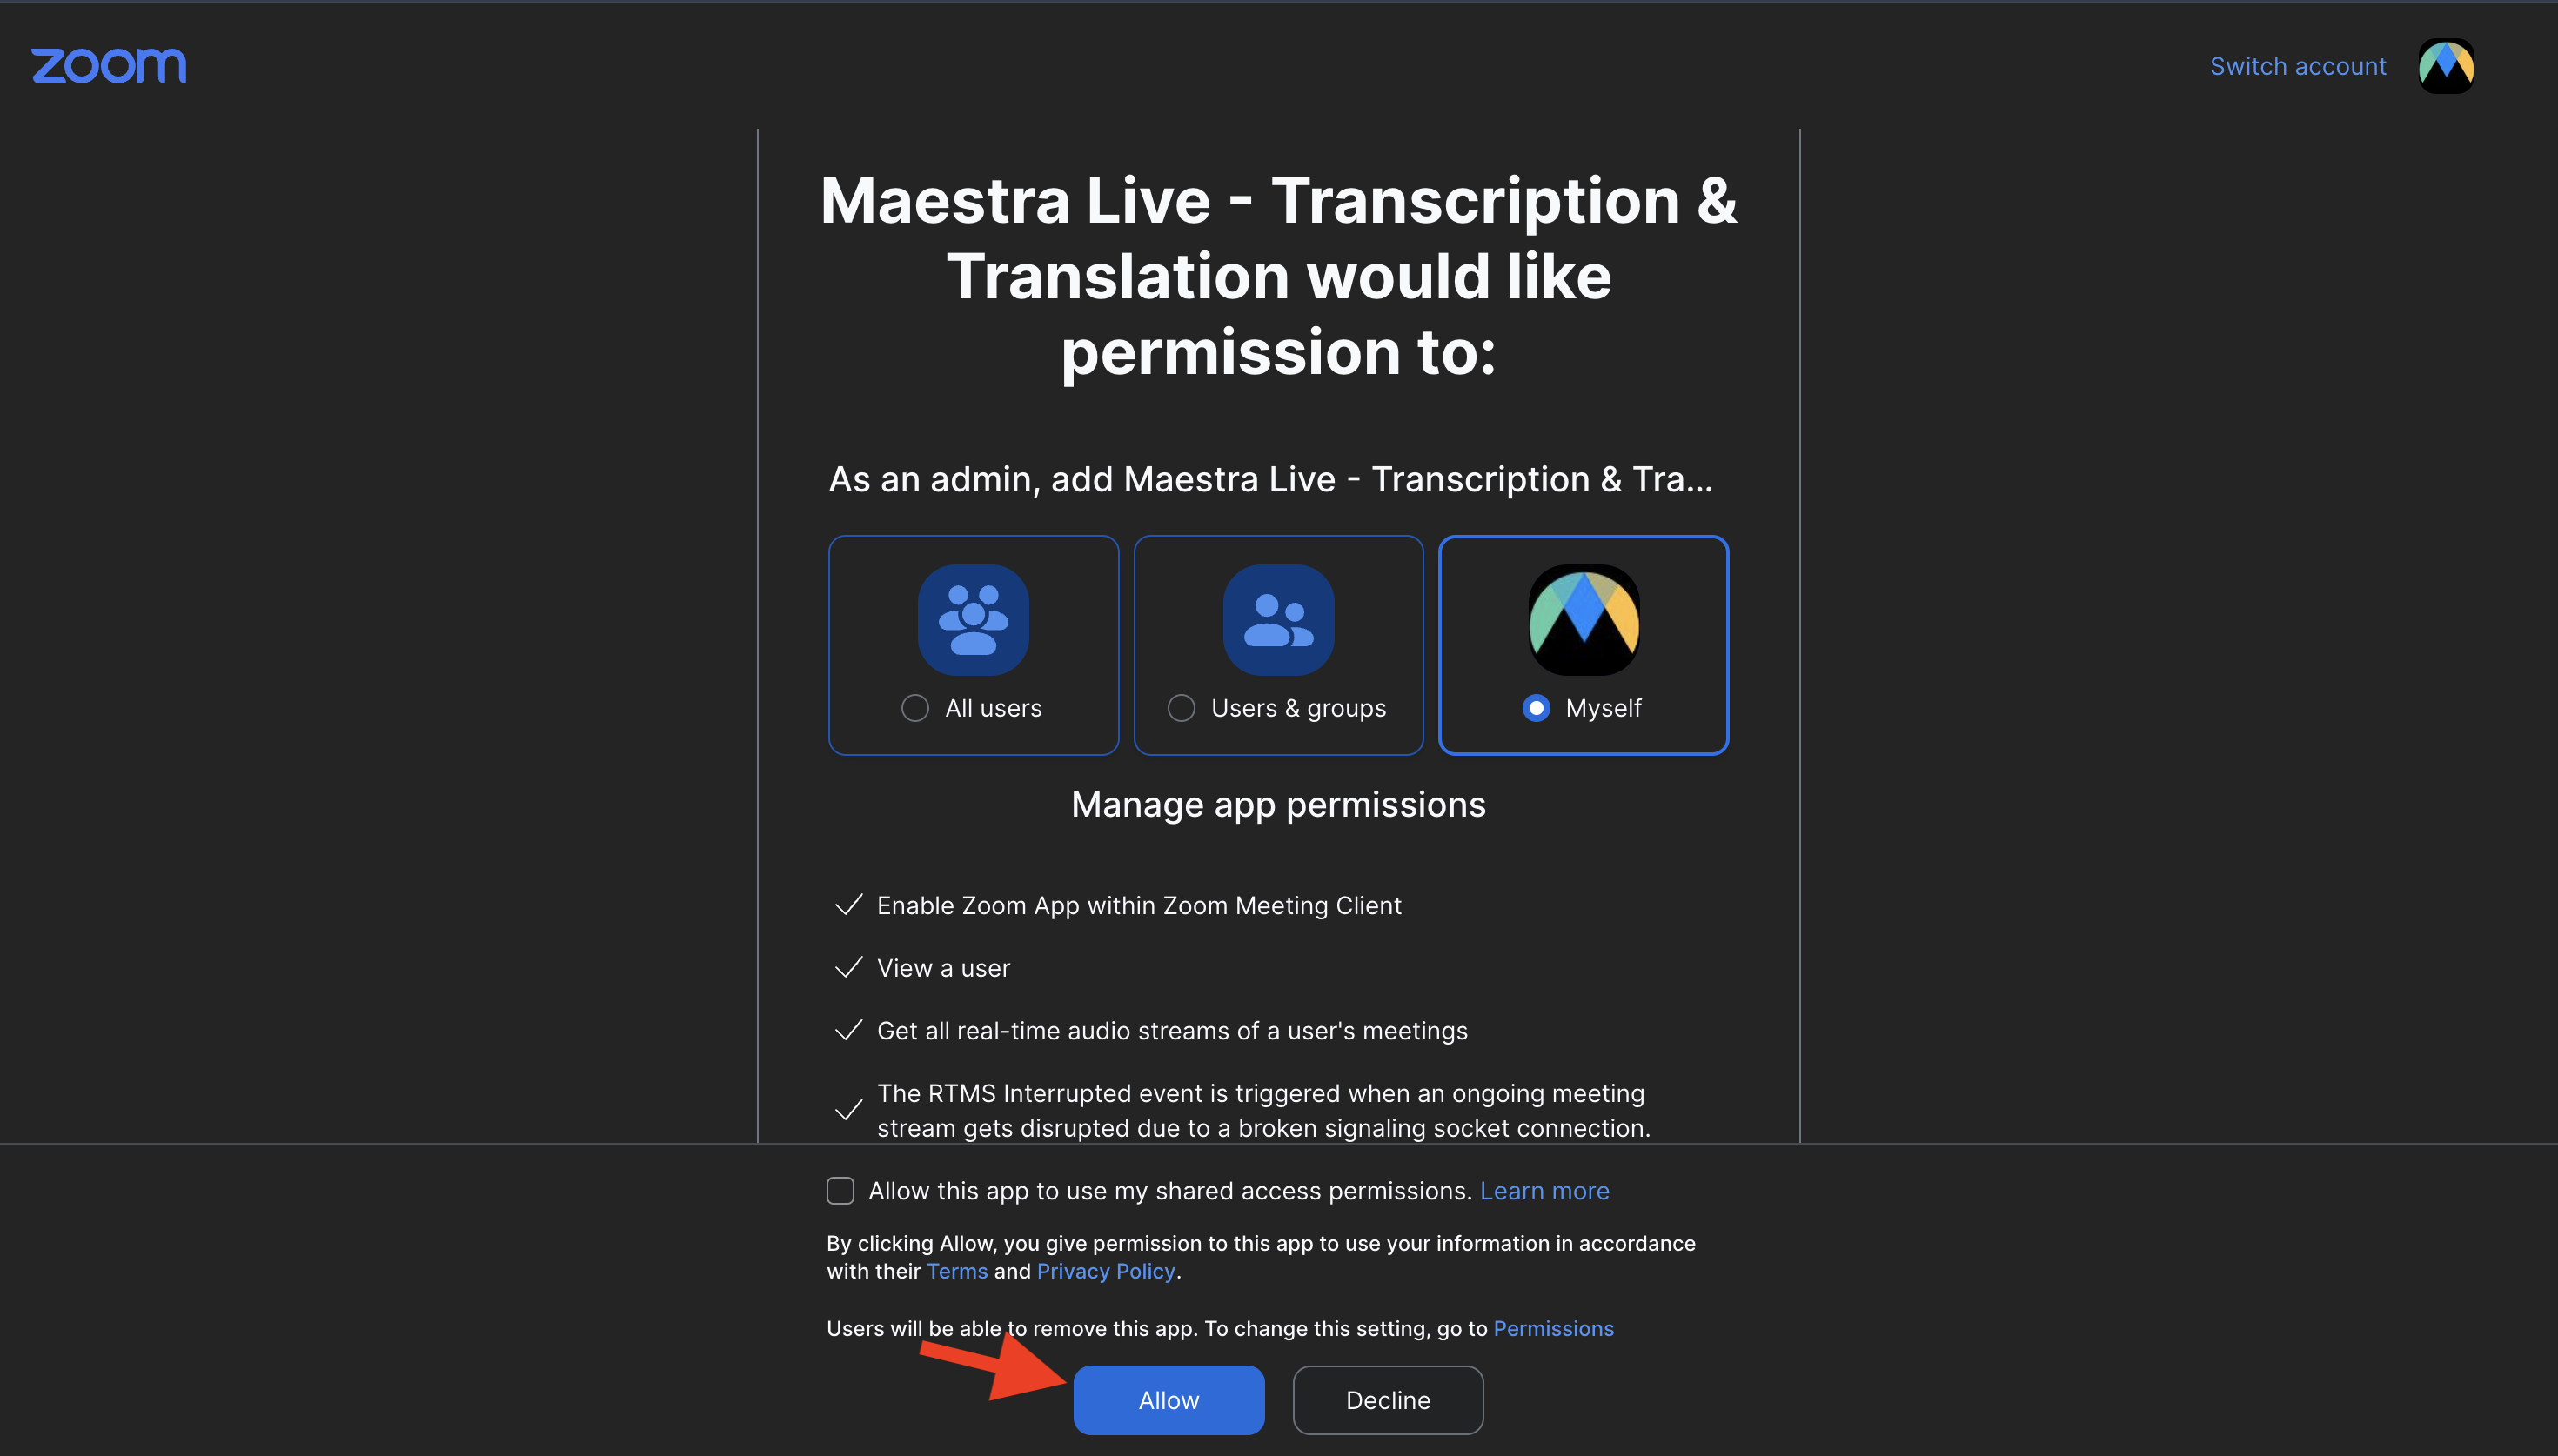
Add and authorize the app
Click Add, review the permissions Maestra needs, including access to your meetings' real-time audio streams, and click Allow.
Link your Maestra account
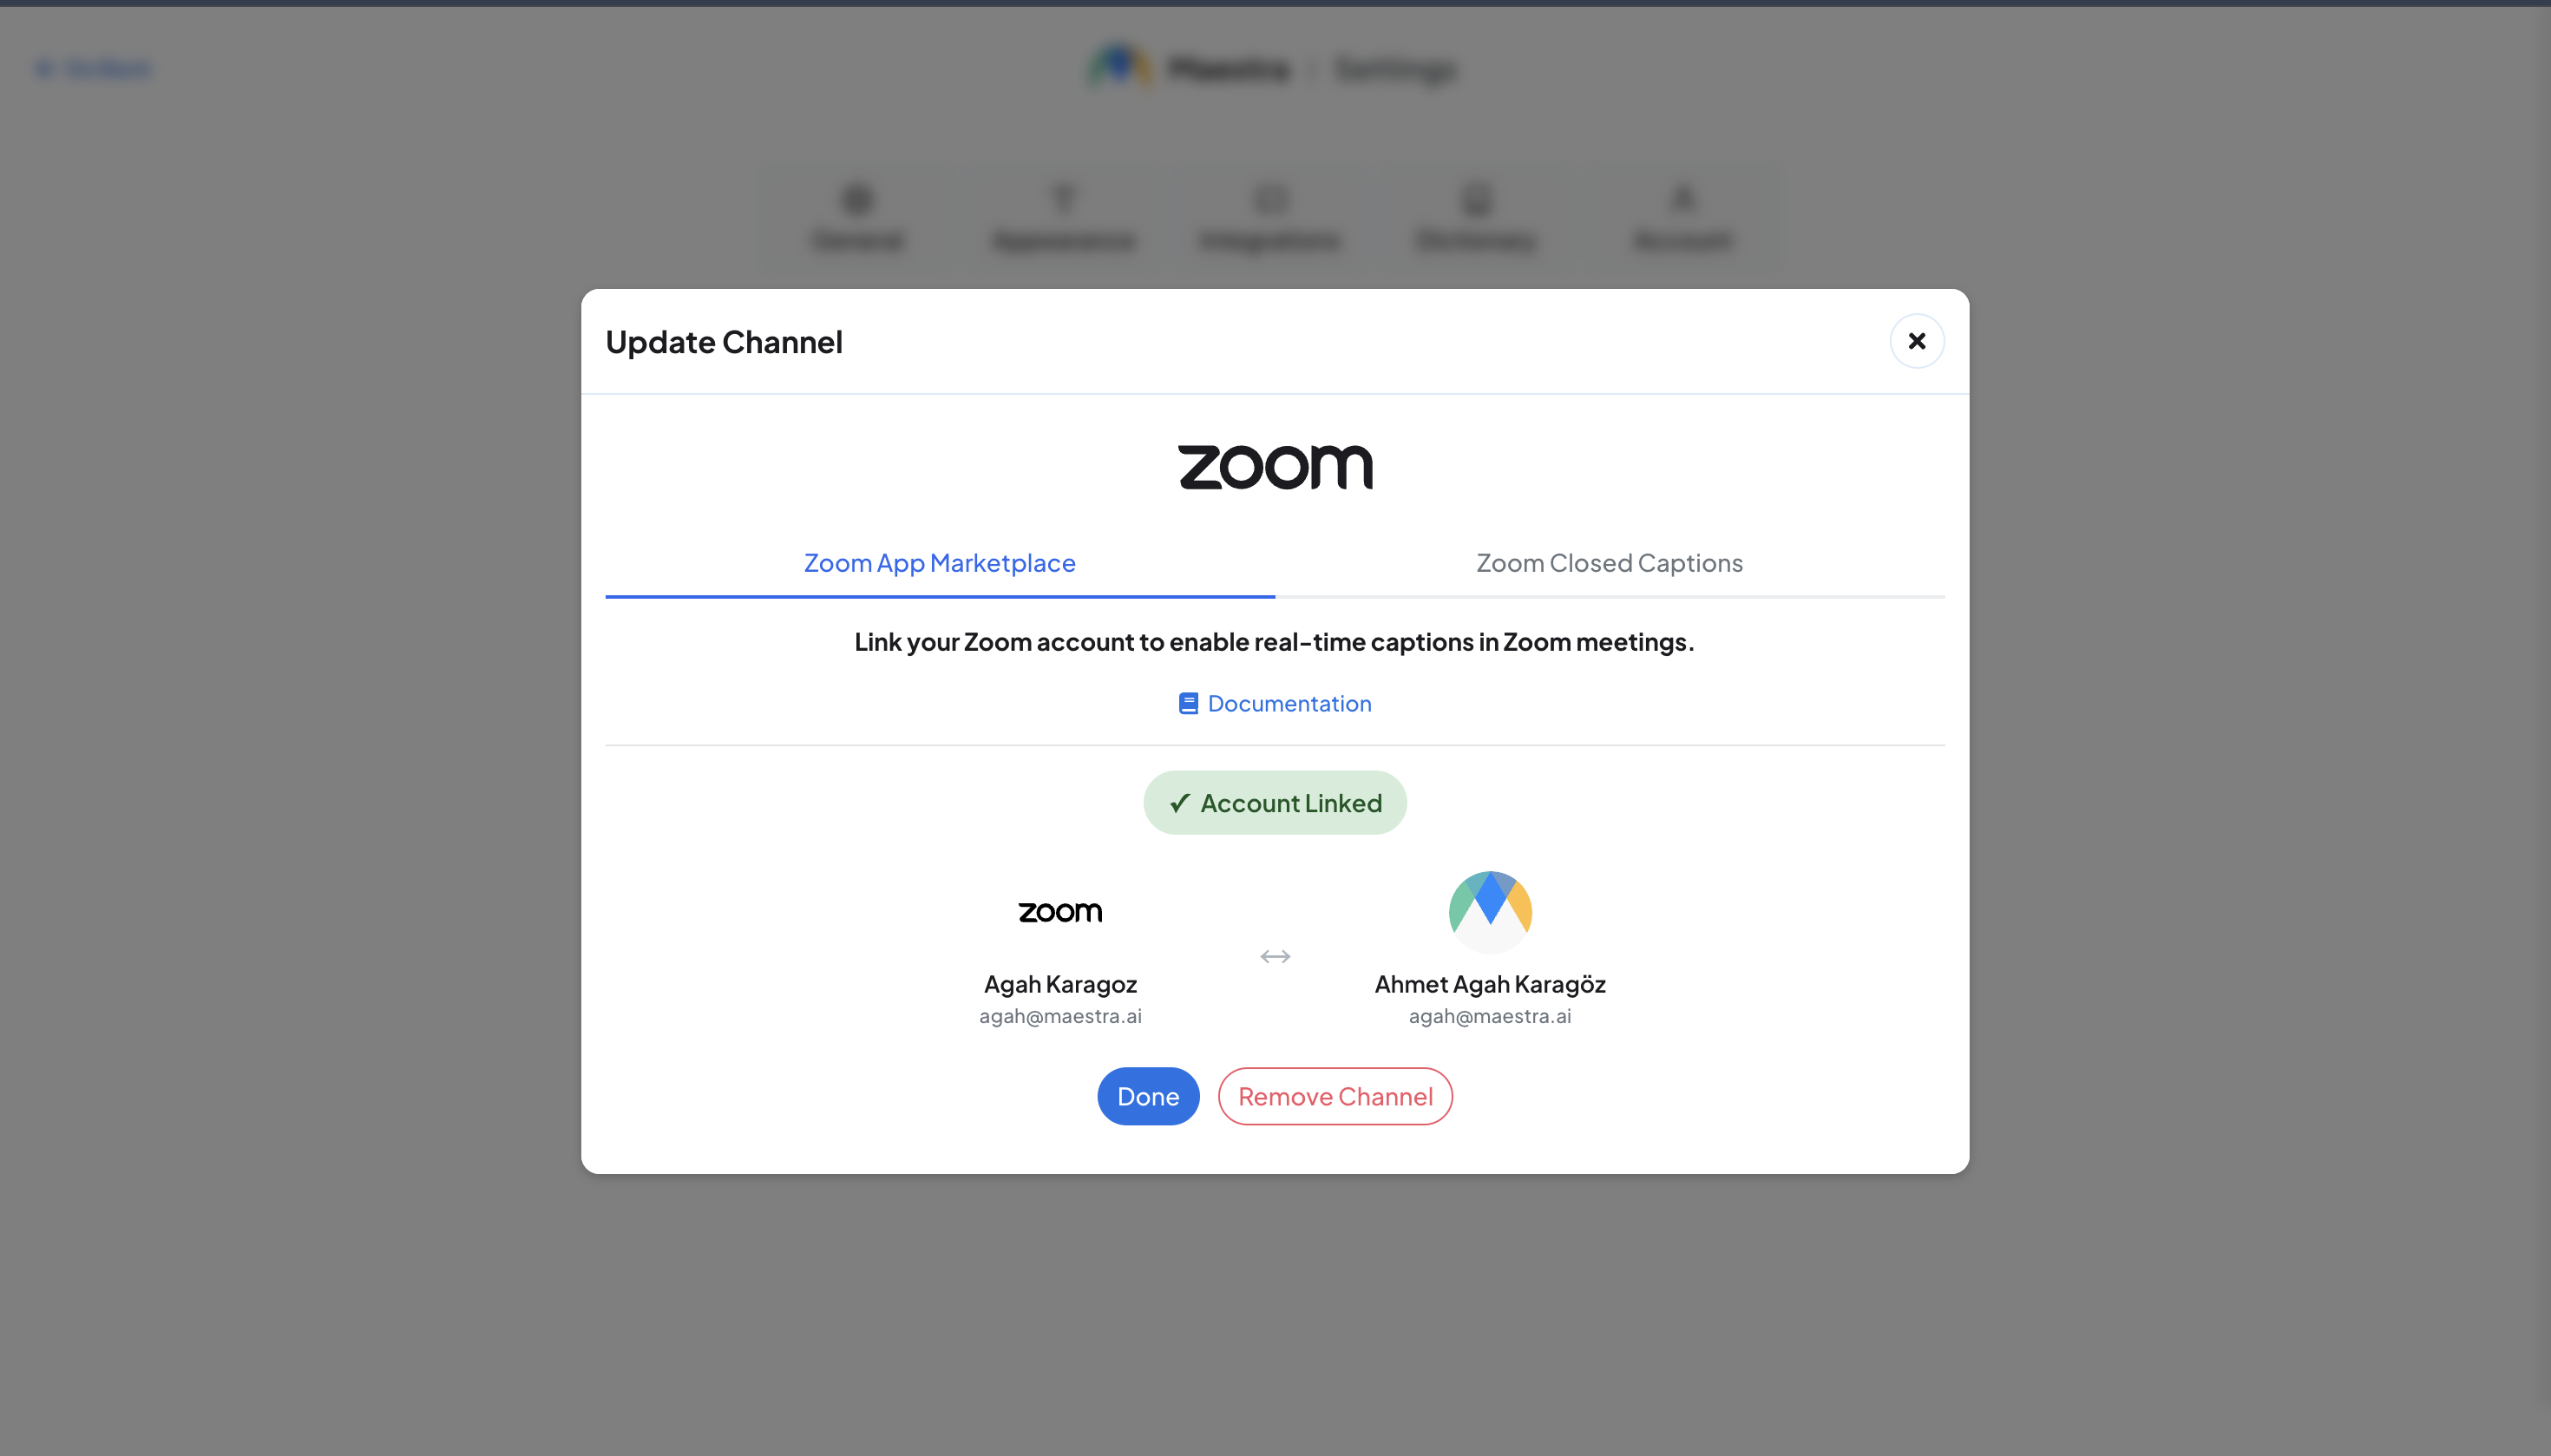
After authorizing, you'll be sent to Maestra to link your accounts. Sign in, or create a free account. When it's done, the Zoom card shows Account Linked — open Integrations from the left sidebar, on the Meeting Integrations tab, to check any time.
2. Start a captioning session
Start or join the Zoom meeting you want to caption. You need to be the meeting host to start a session.
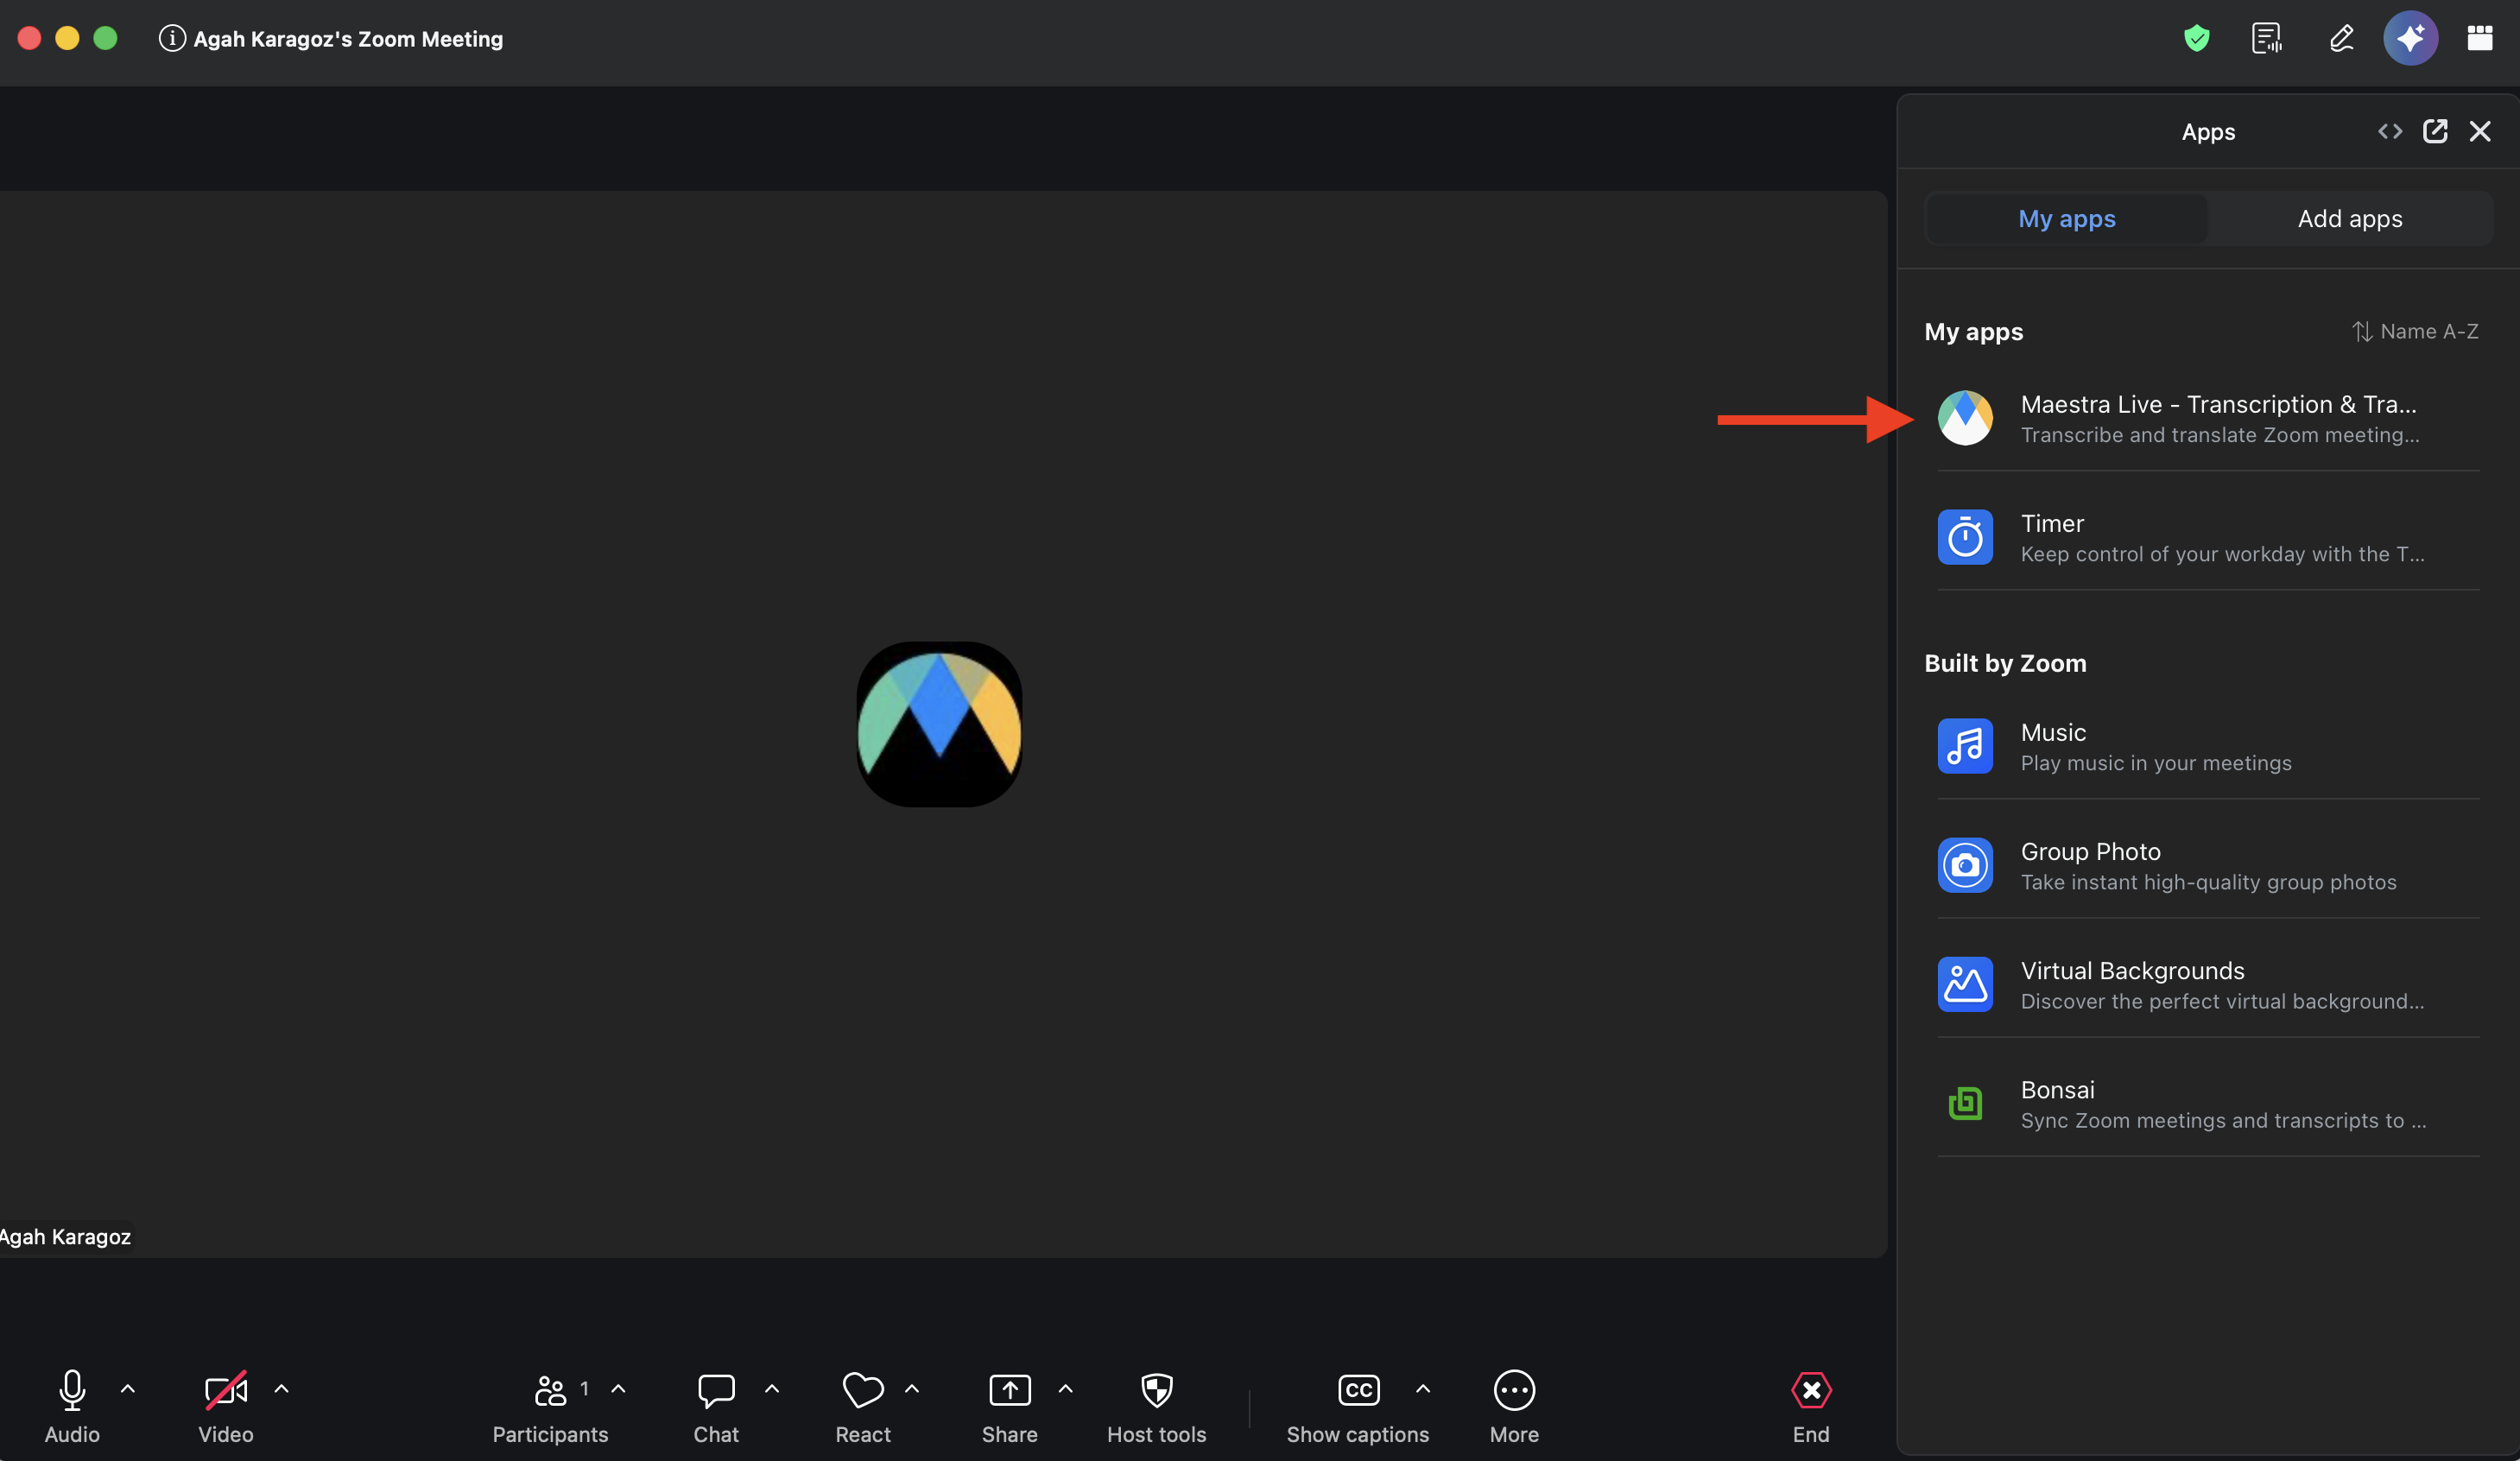
Open the Maestra app in your meeting
In the meeting toolbar, click Apps (or More → Apps) and open Maestra Live - Transcription & Translation.
Choose Transcribe or Translate and pick your languages
Pick the mode you need:
- Transcribe — captions in the language being spoken. Leave the speaker language on Detect Language, or choose a specific one.
- Translate — choose the speaker's language, then add one or more translation languages.
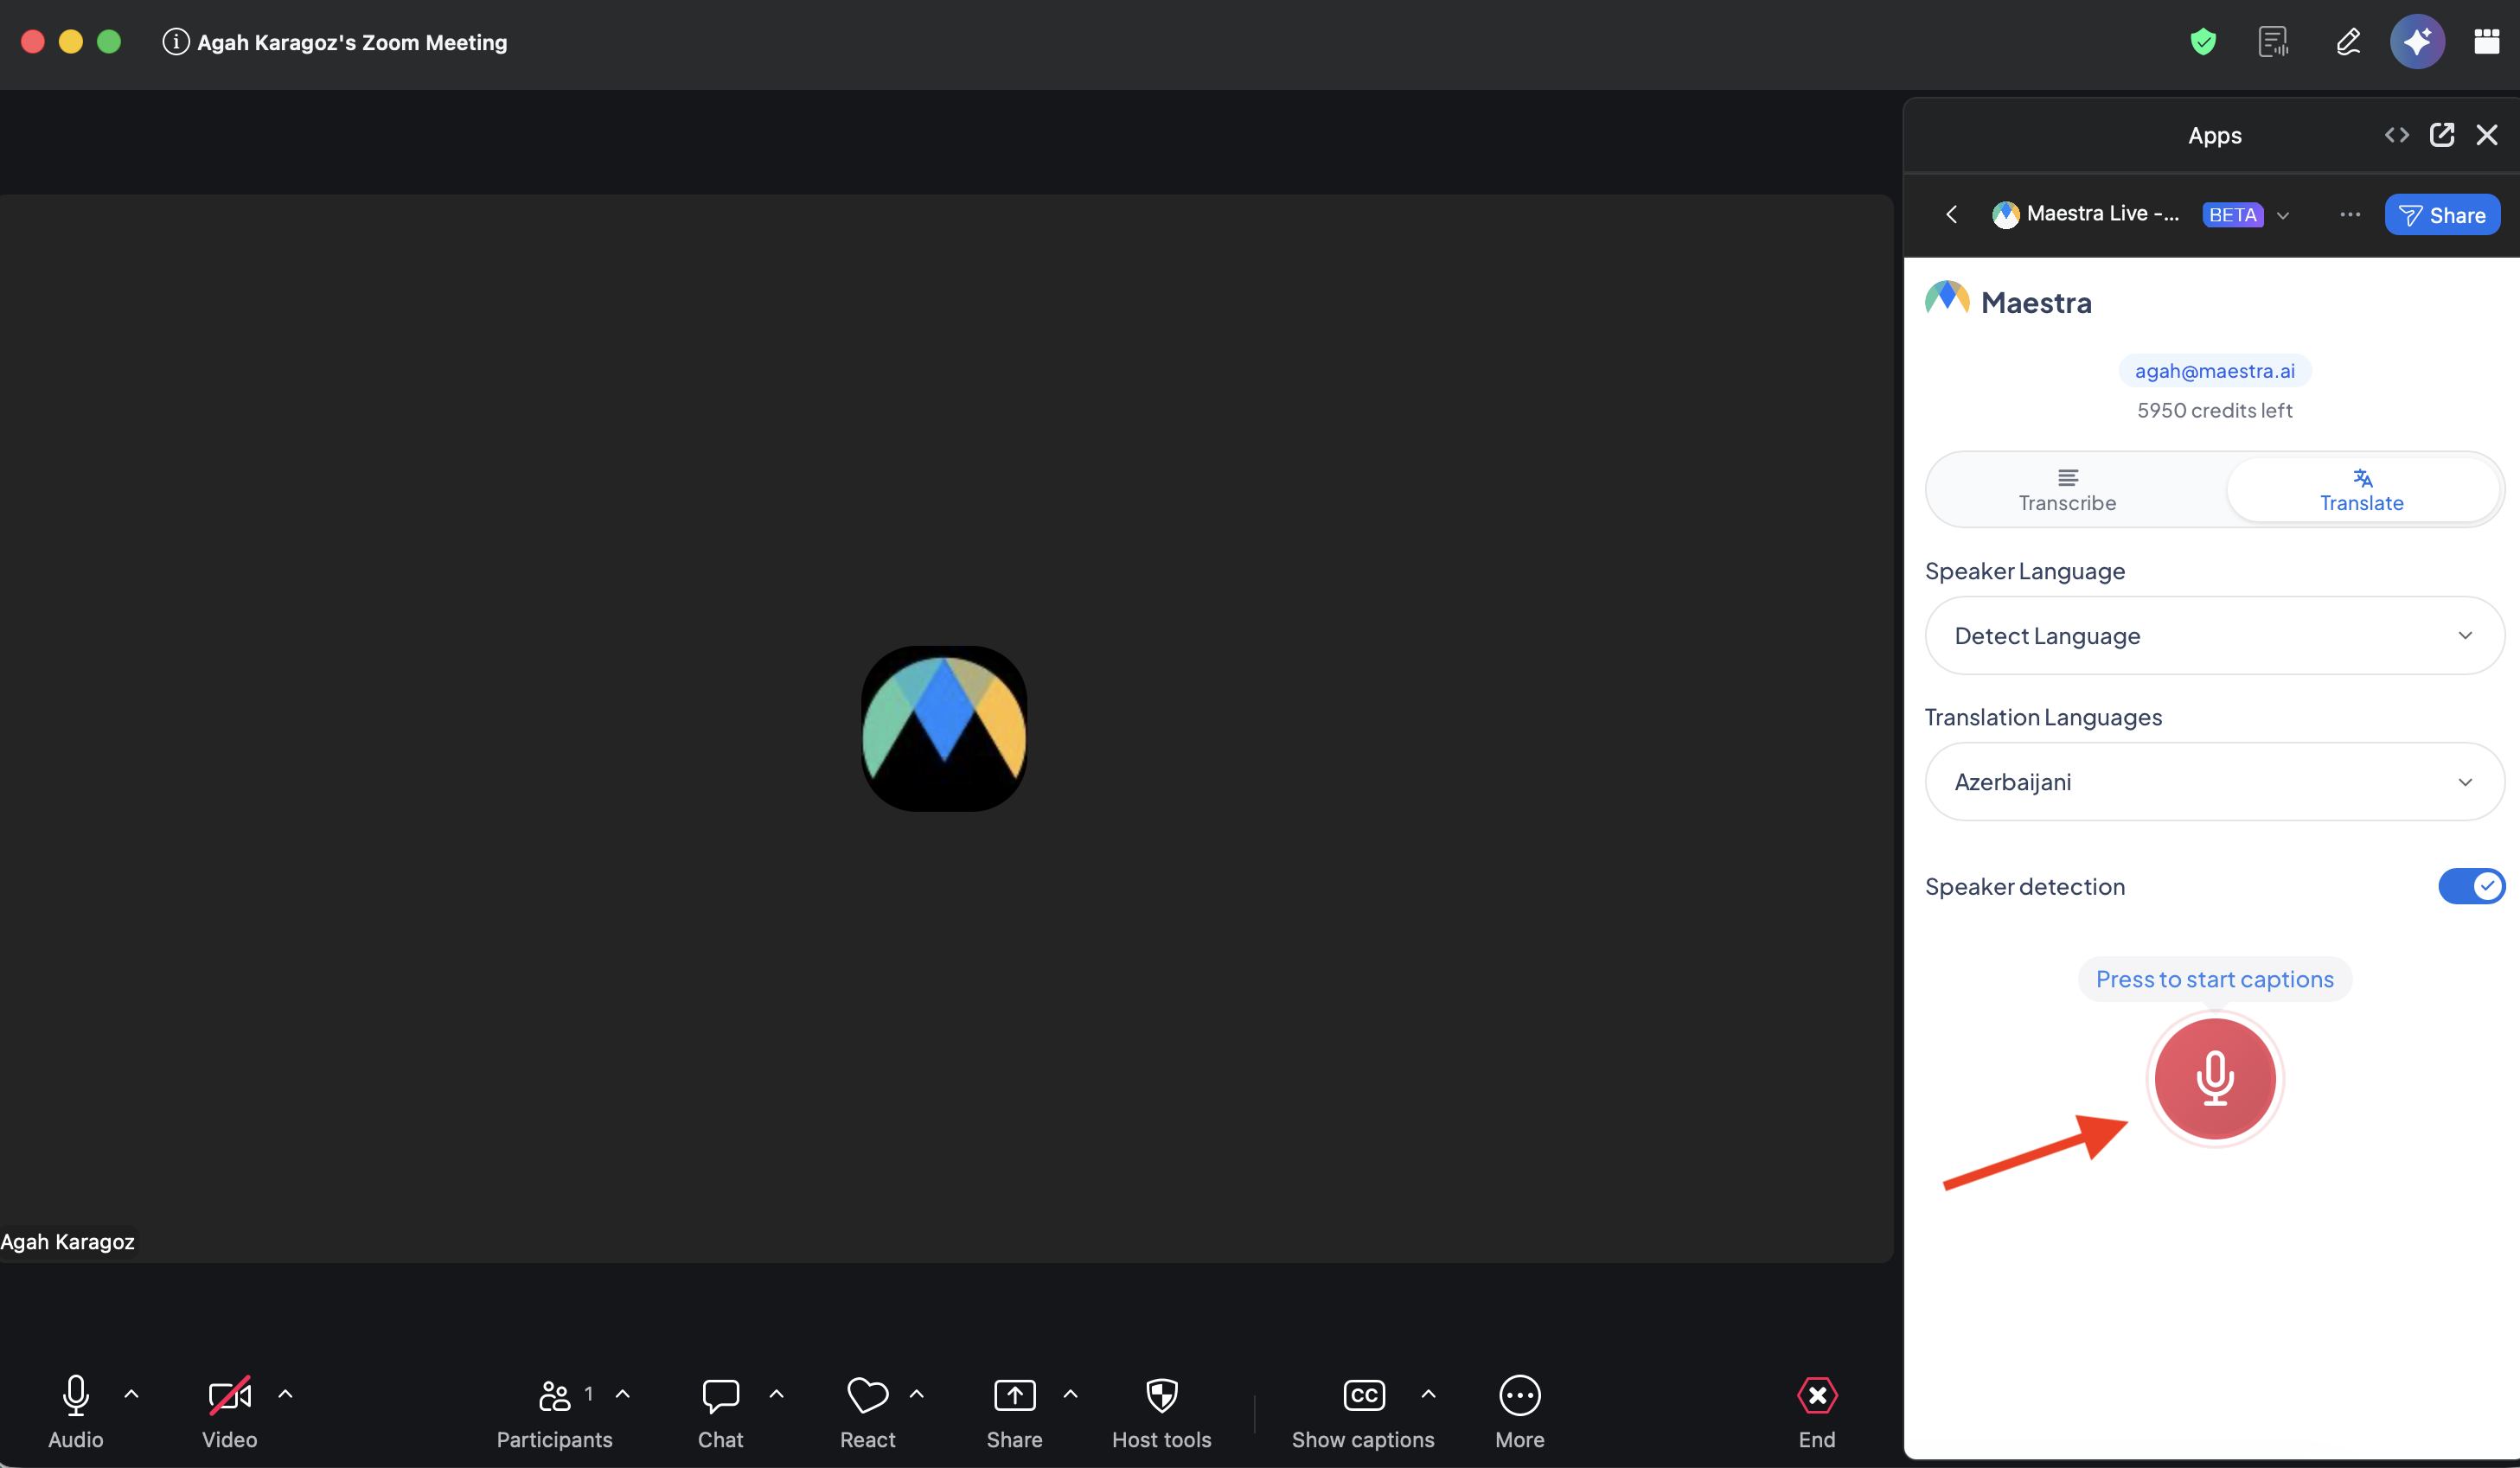
Optional: turn on Speaker Detection
With Speaker detection on, captions are labeled by speaker (Speaker 1, Speaker 2…). Set it before you start.
Start live captions
Press the red microphone button — Press to start captions. Maestra connects to the meeting audio and starts captioning within a few seconds. The panel header switches to Live Captions Active and the captions begin scrolling underneath it.
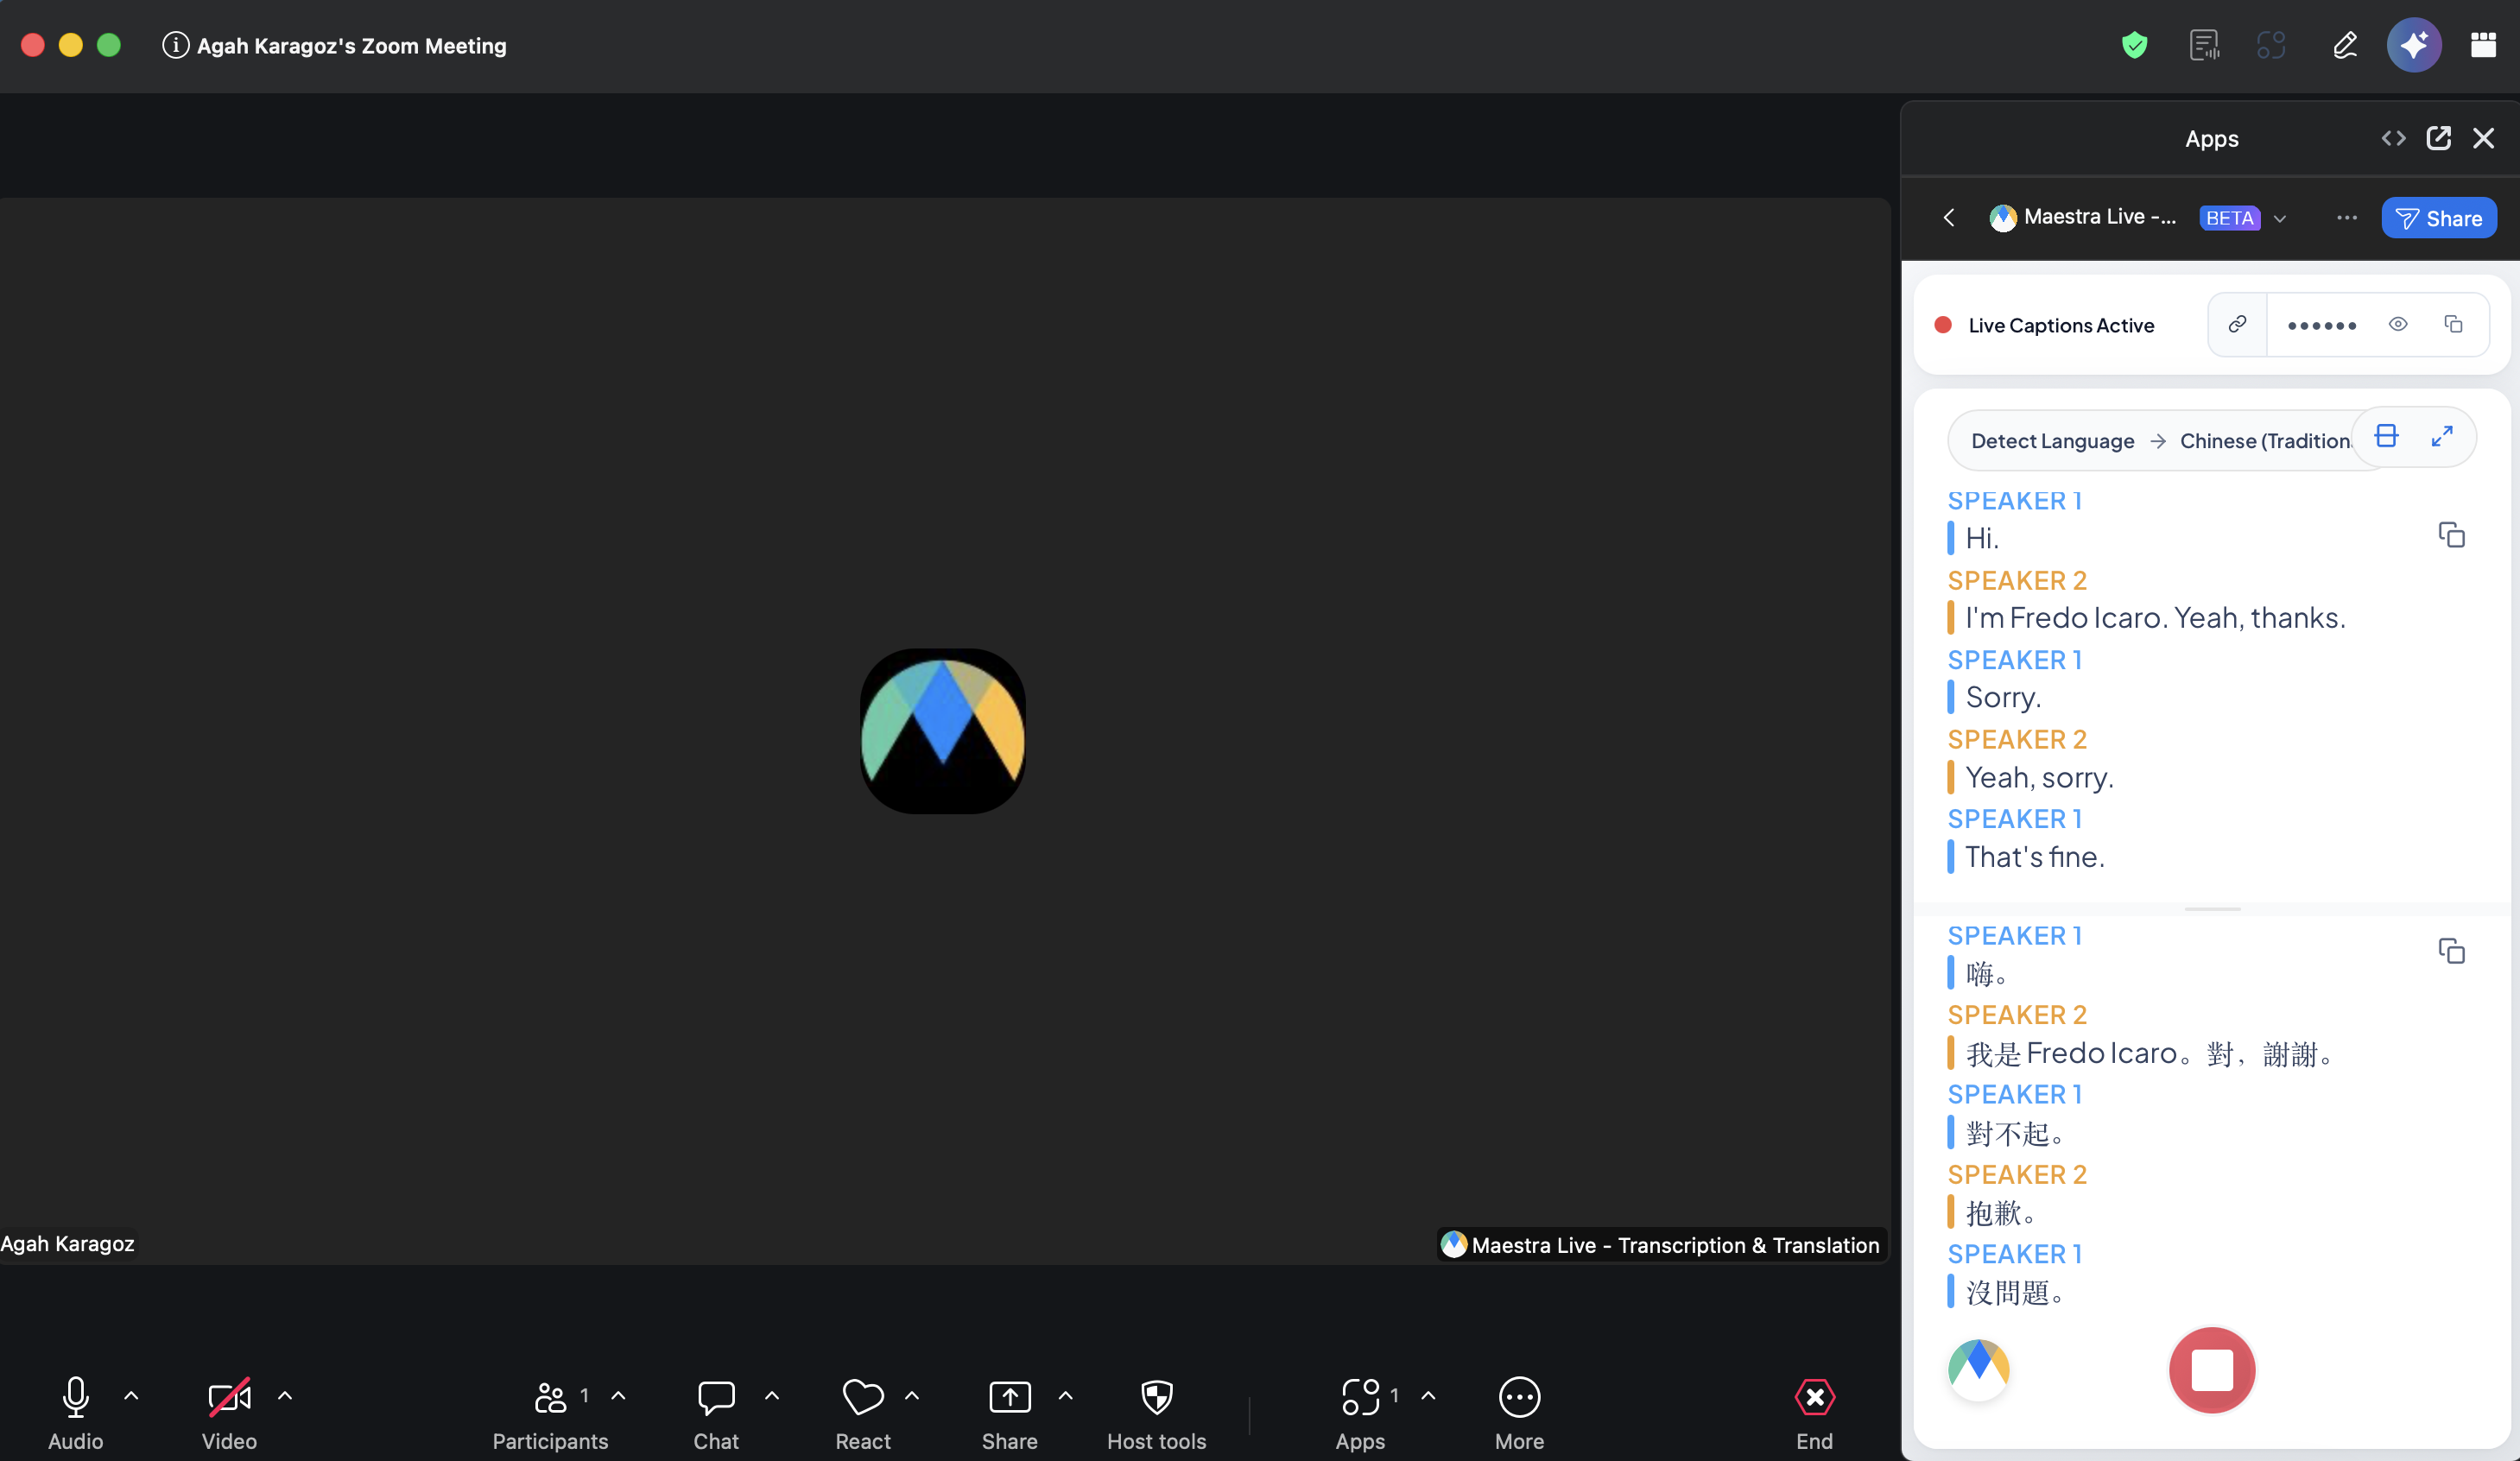
3. Share captions with everyone
When a session starts, Maestra creates a live caption page that anyone can open, with no Maestra account needed. There are two ways to hand it out.
The link is posted to the meeting chat
Maestra automatically posts a message into the Zoom meeting chat with the join link and password. Attendees click it to open the captions.
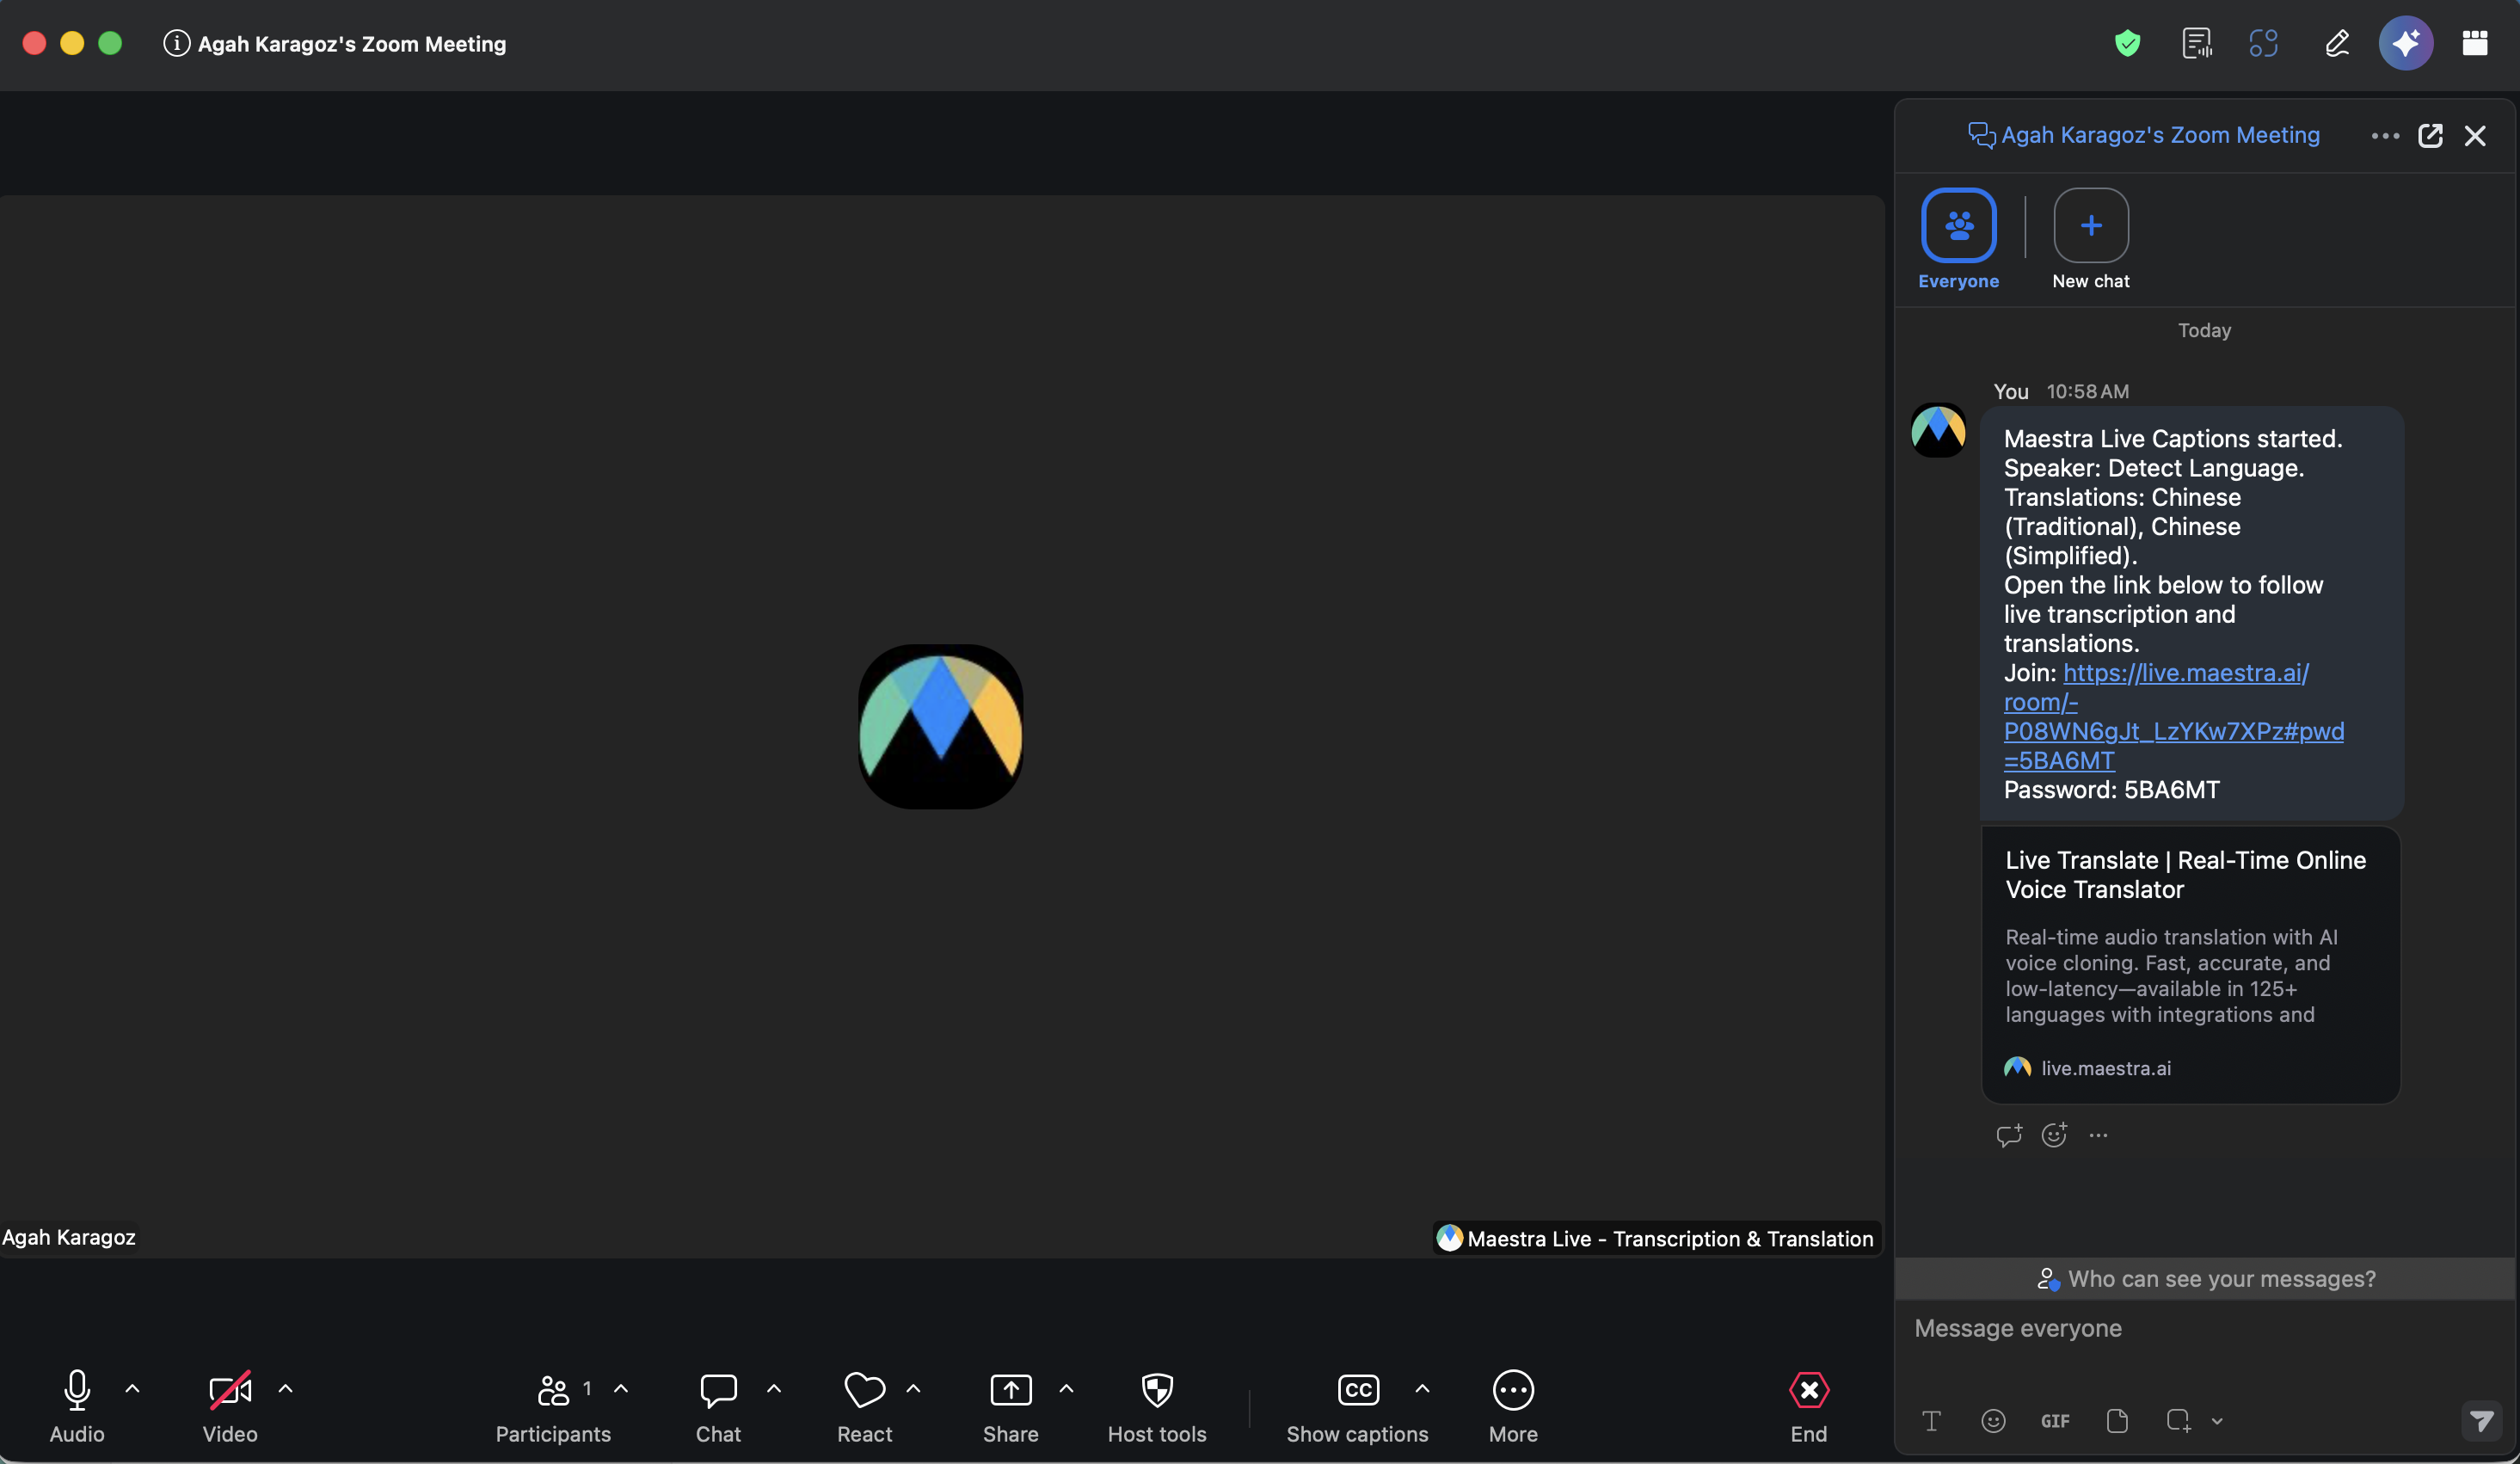
Or copy the link yourself
The same link sits in the header of the app panel. Click Copy room URL — the chain icon, when the panel is too narrow for the label — to copy a join link with the password already baked in, and paste it wherever you like. The Pwd chip beside it reveals or copies the bare password on its own, for anywhere that strips the link.
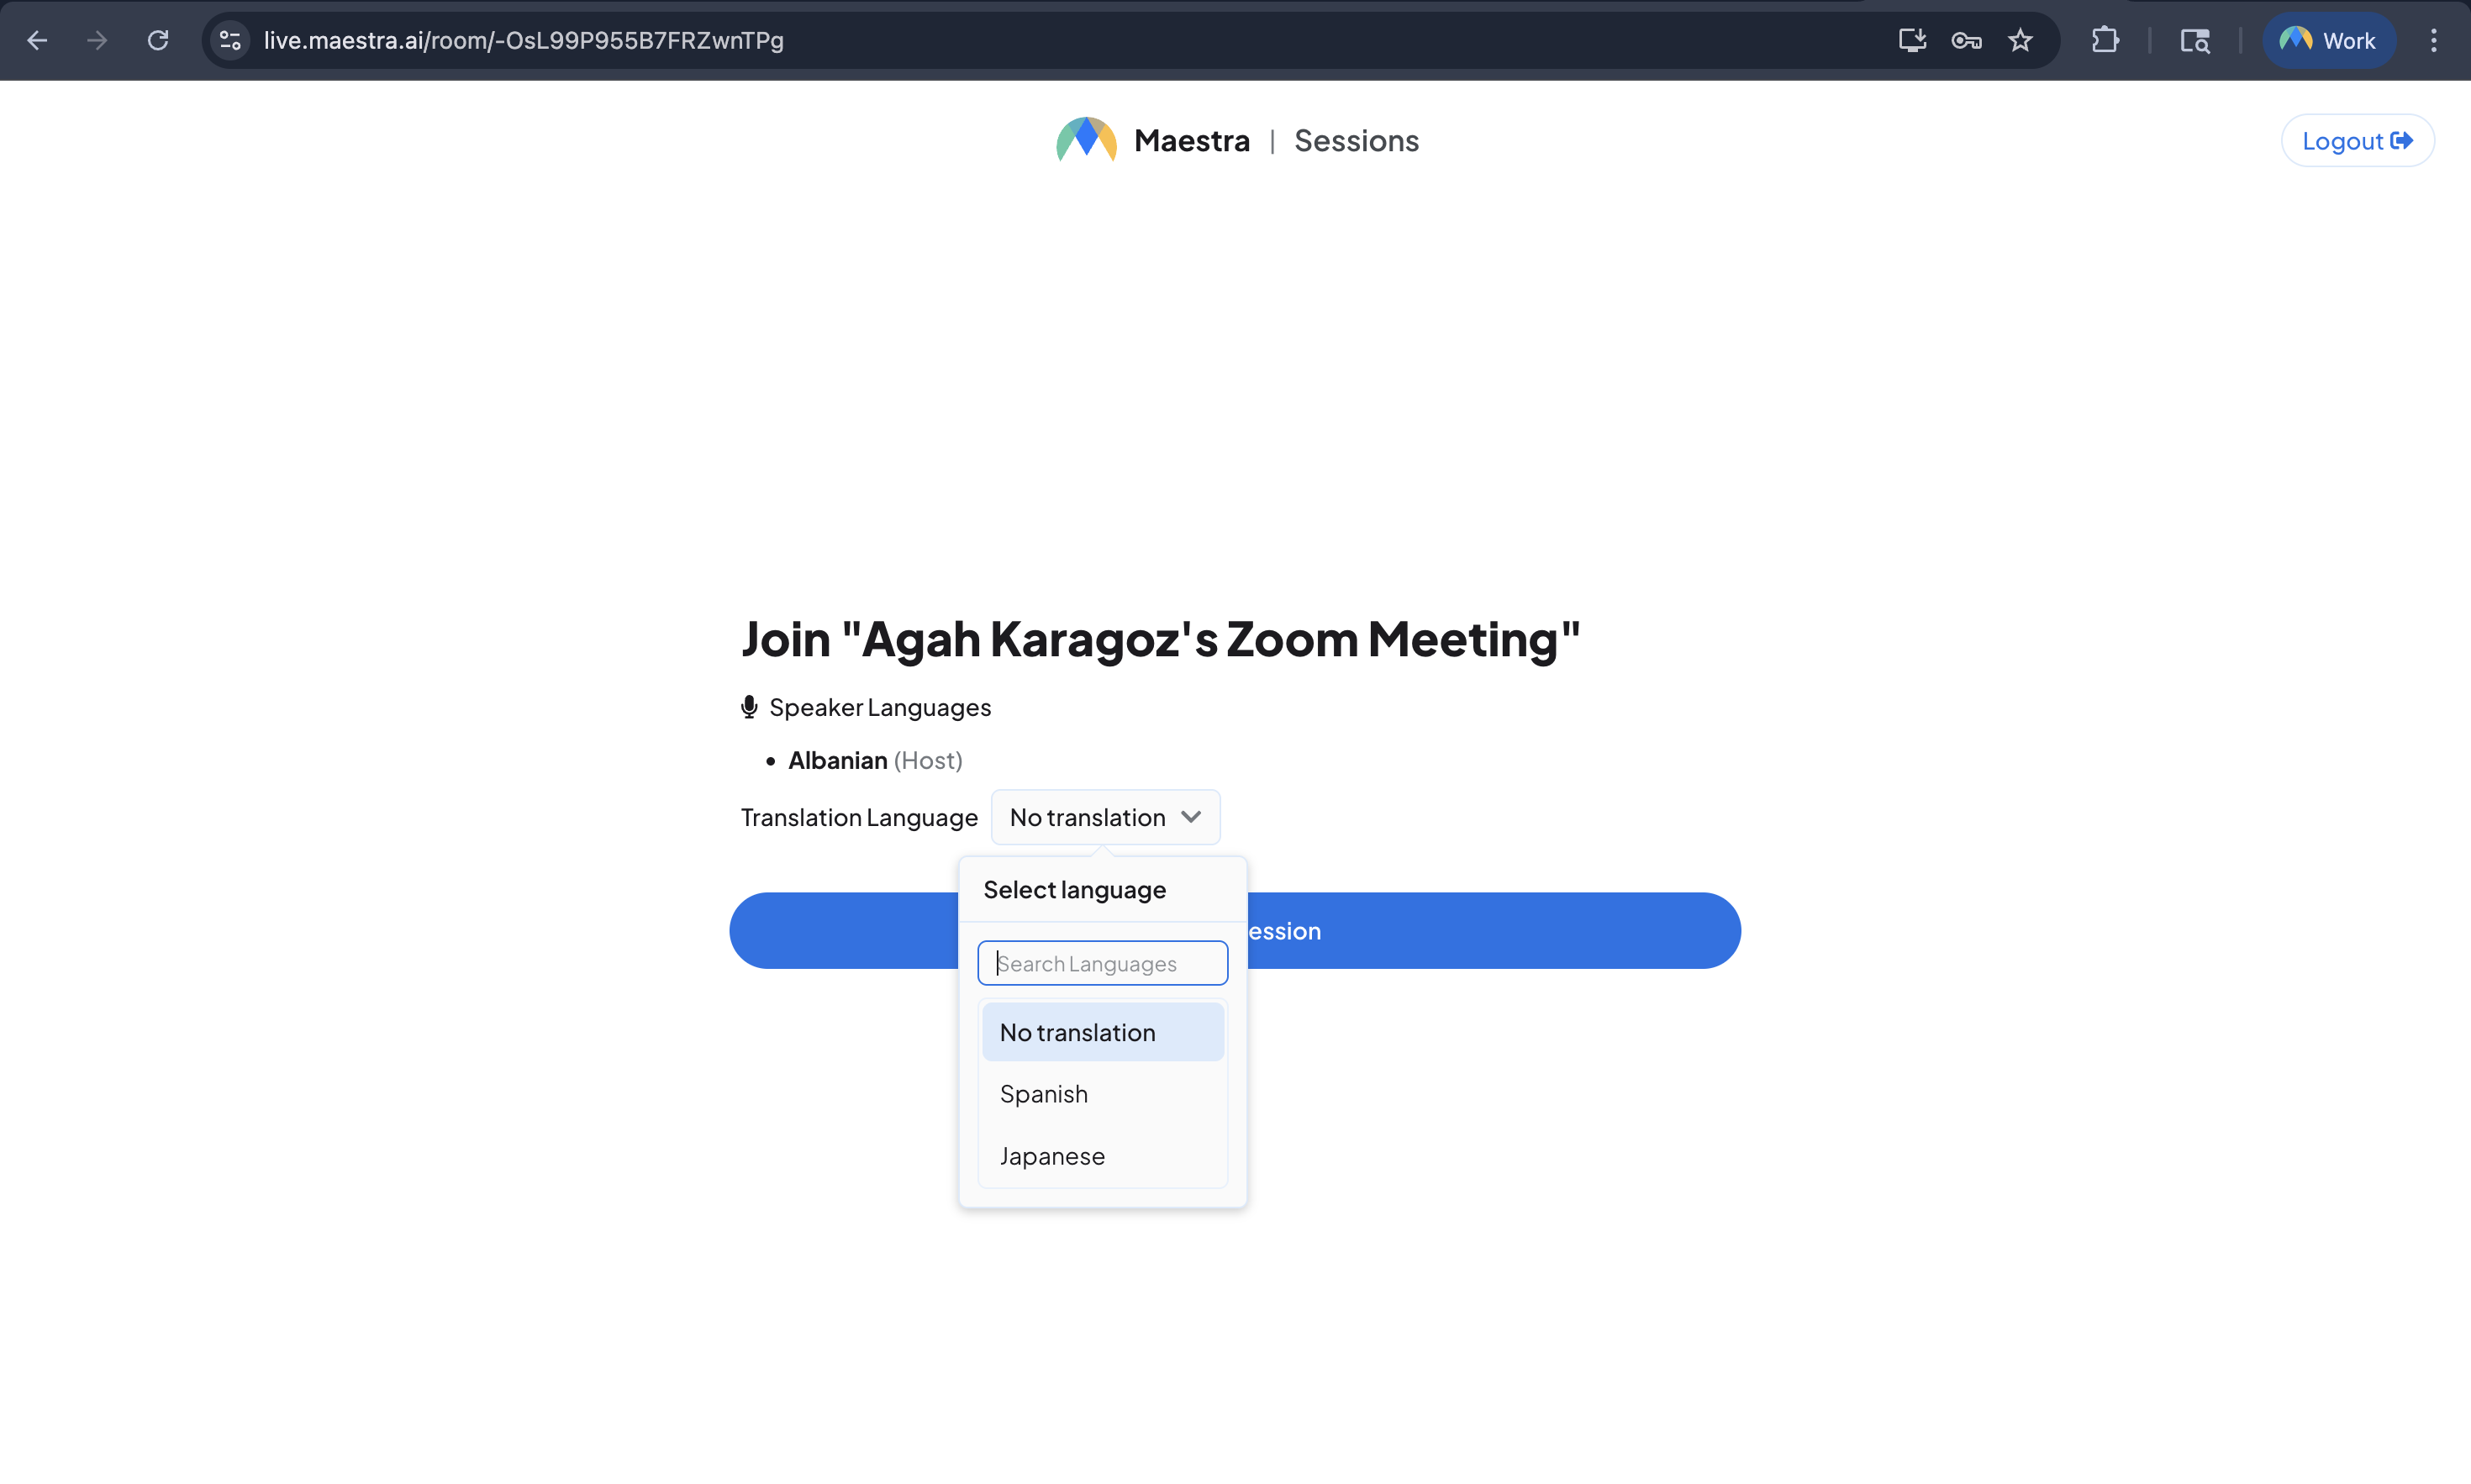
Viewers pick their language and join
When someone opens the link, they choose a translation language (or the original) and join. Every viewer can pick their own language, on any device.
4. Watching inside Zoom
Attendees don't have to leave the meeting to read along. Anyone in the meeting can open the same Maestra Live app from the Apps menu and watch in their own Zoom window.
Before you start, their panel shows Waiting for host. Once you start the session and the join link lands in the chat, they paste it into the panel and the captions appear right there, each attendee reading in the language they pick.
Webinar setting
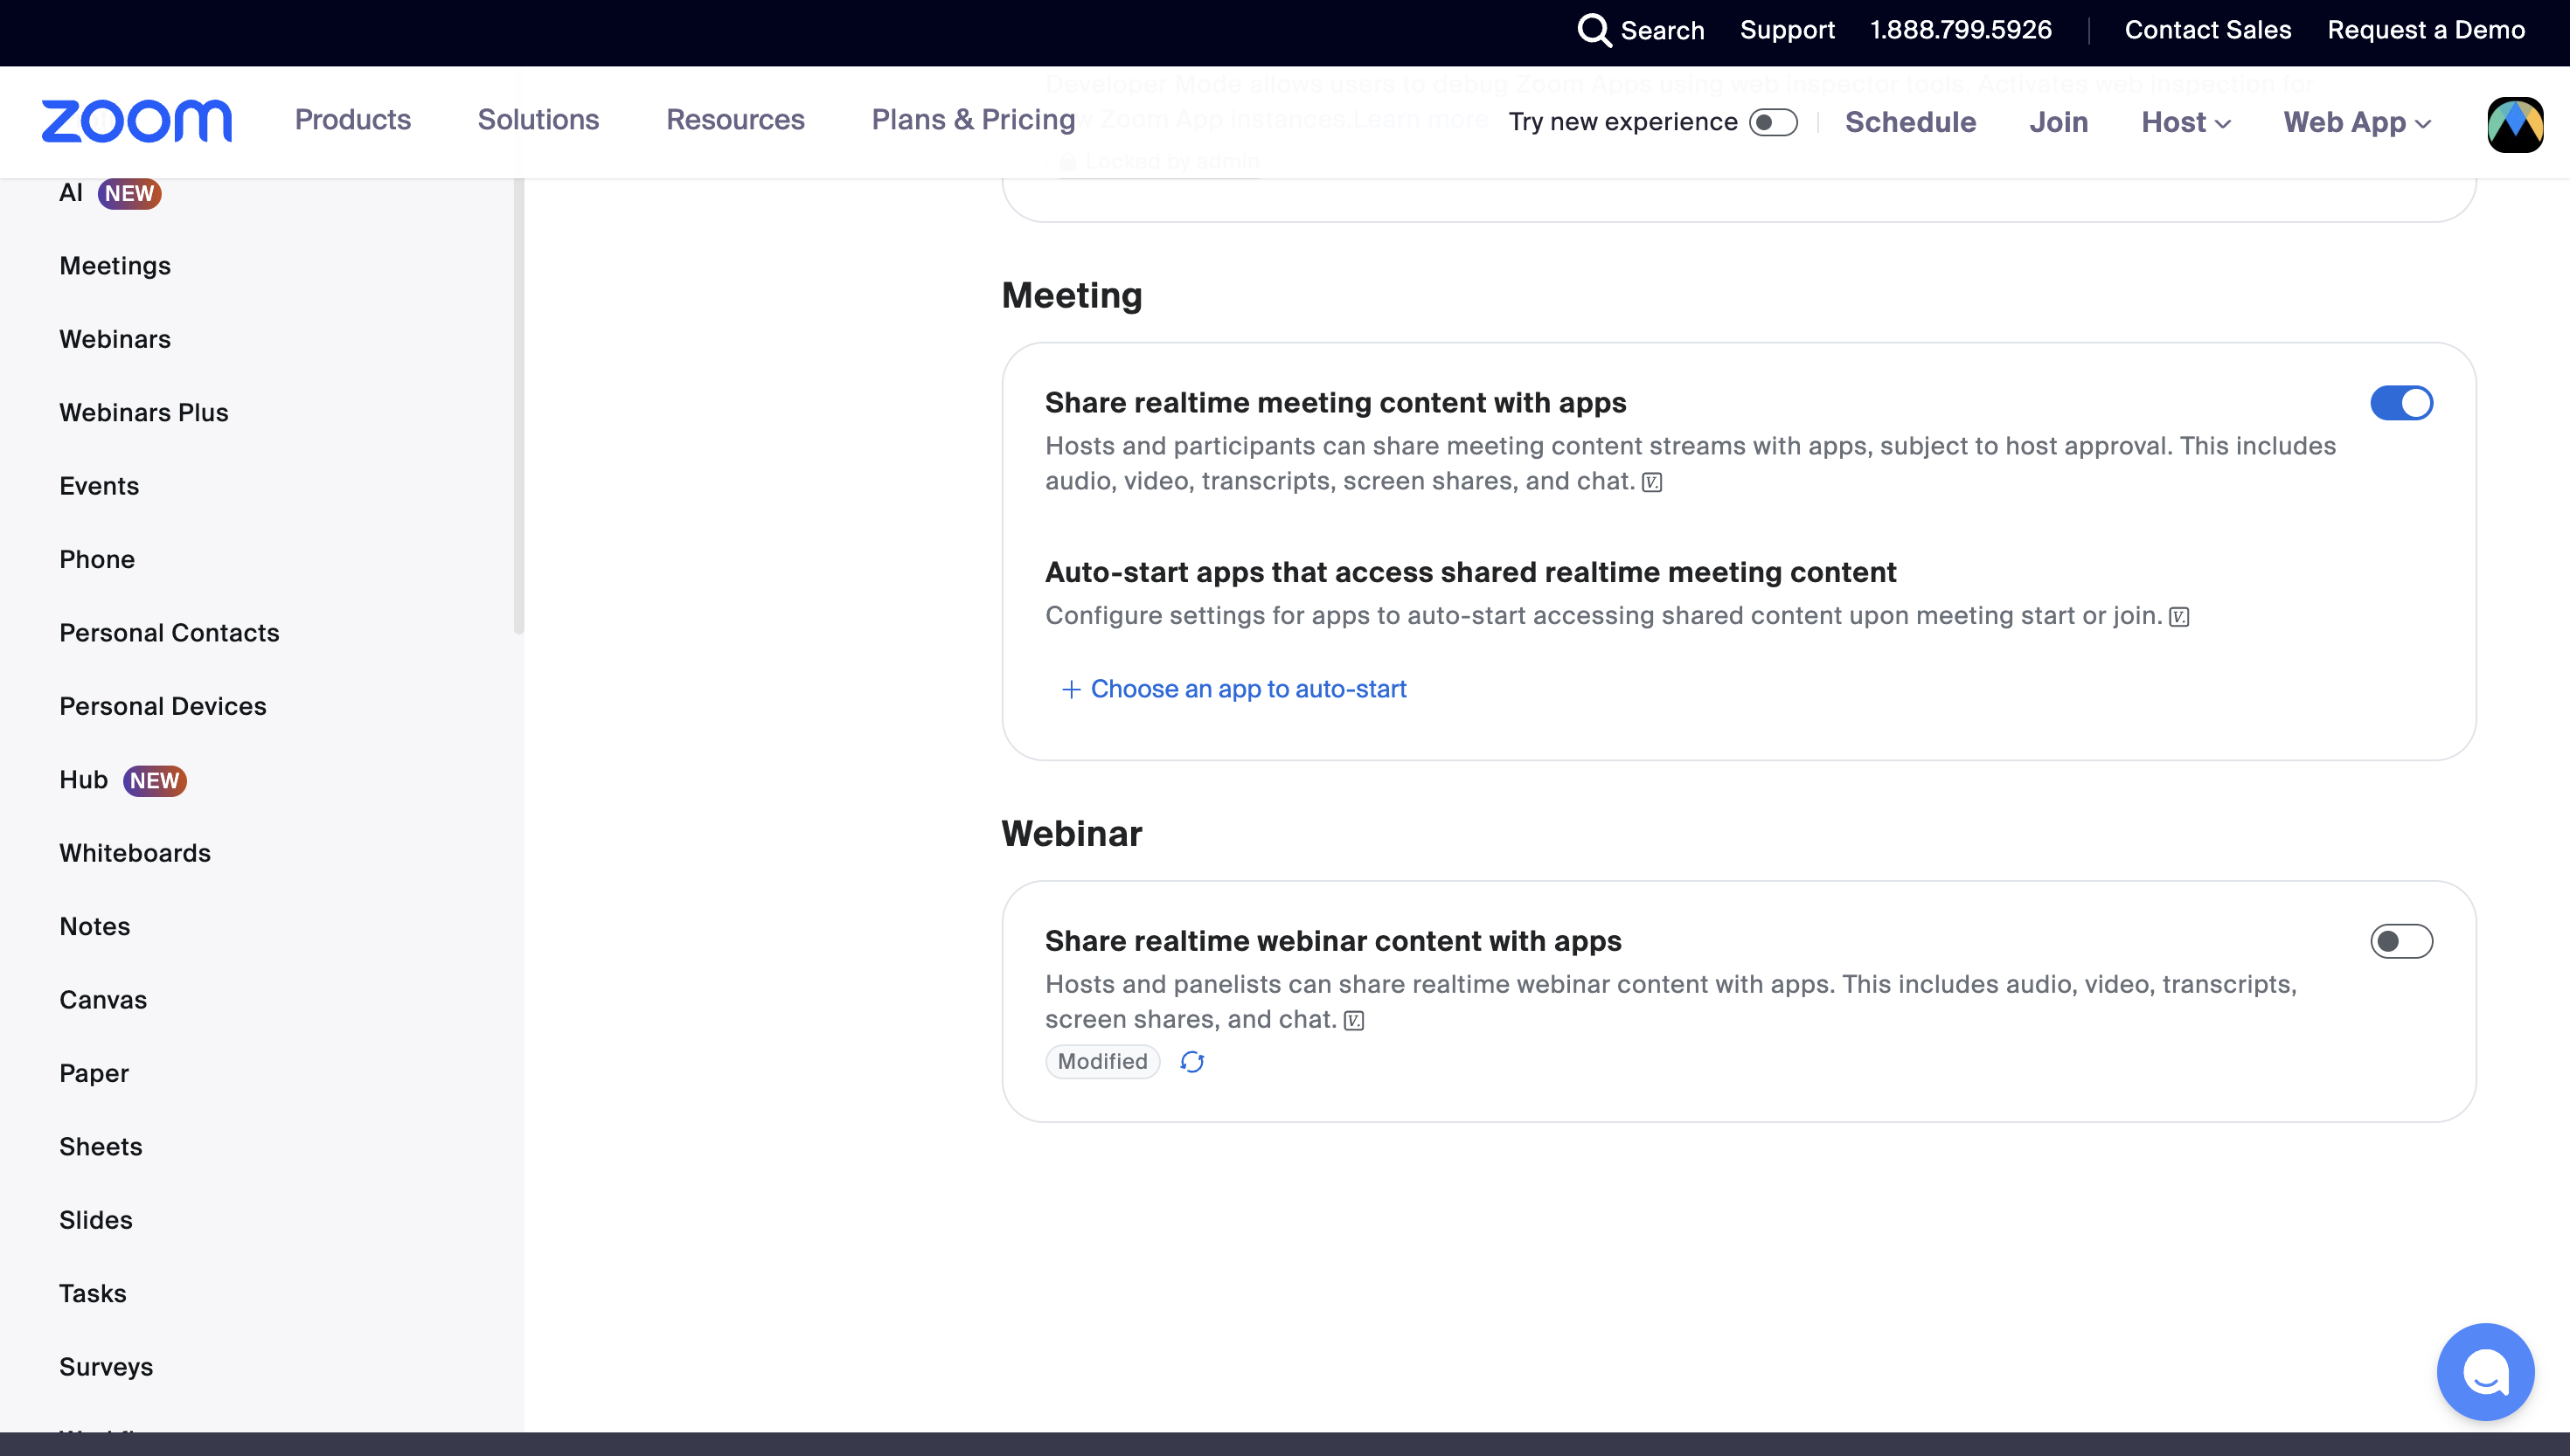
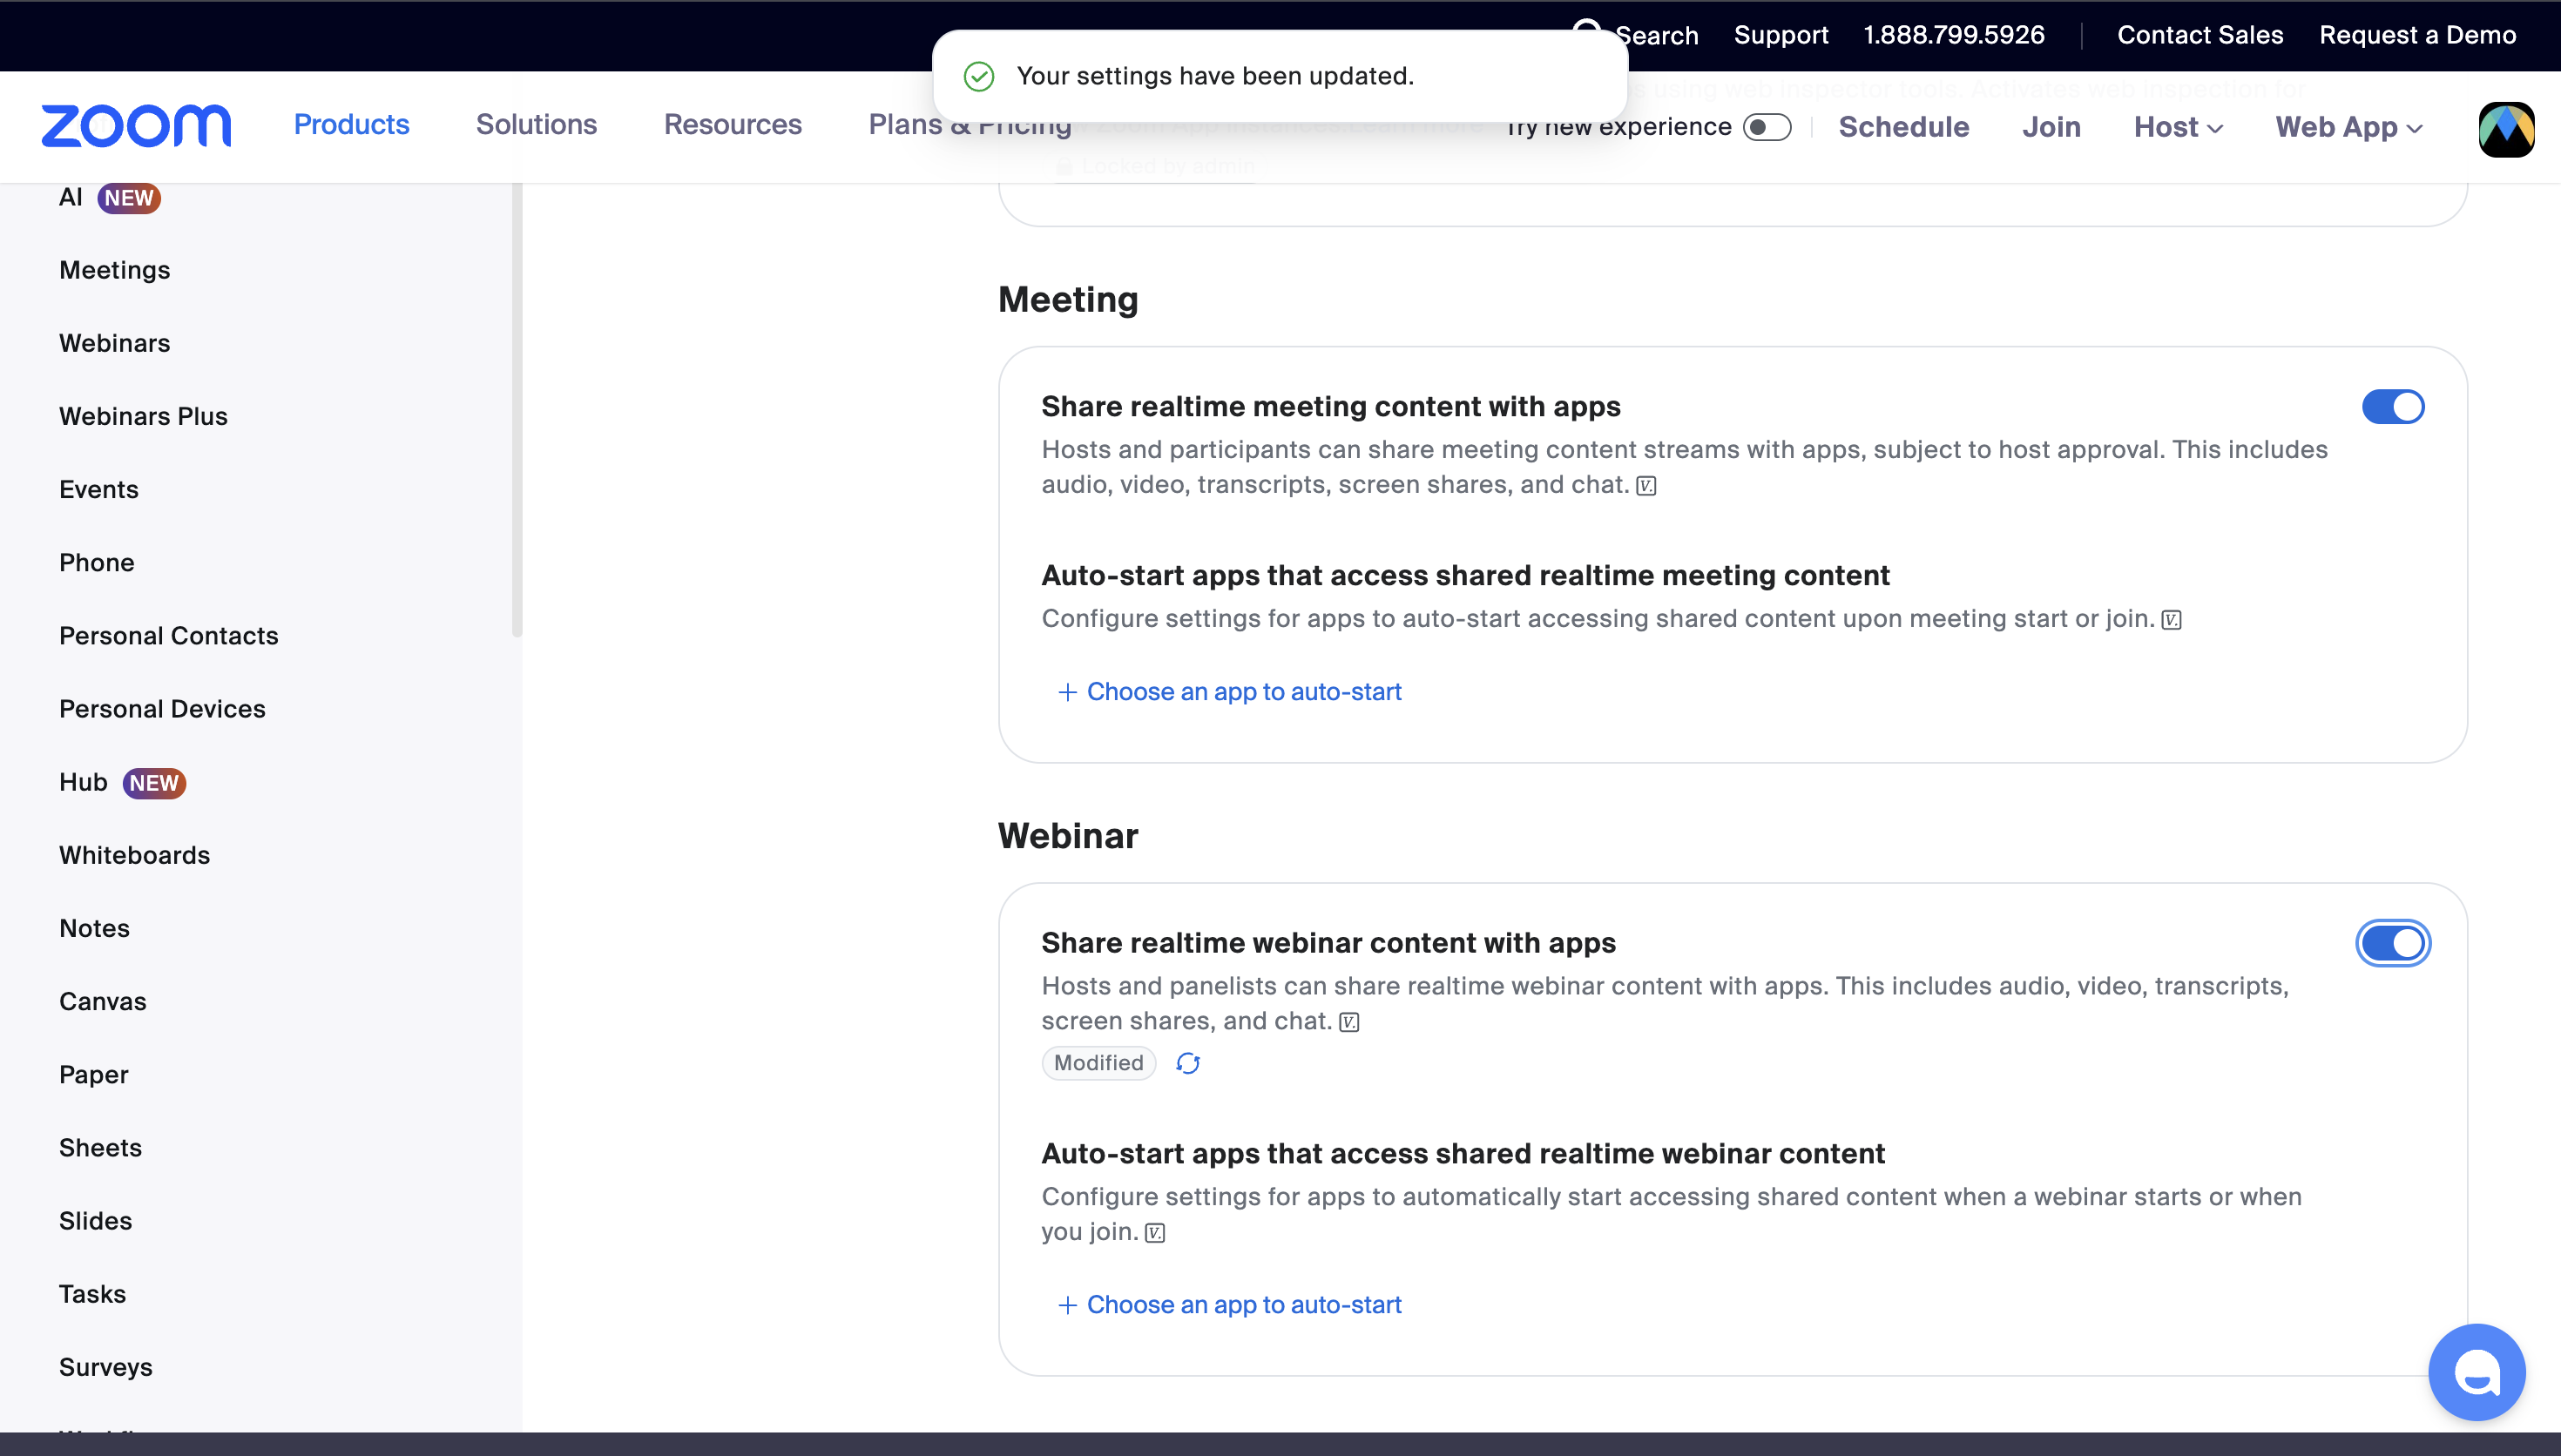
Zoom keeps one switch that decides whether apps may receive live audio at all. It ships on for meetings but off for webinars, so a webinar is usually the first place you meet it: the panel reports that Zoom won't share the audio, and no captions appear.
Open your Zoom settings
Turn on realtime webinar content
Under Webinar, turn on Share realtime webinar content with apps. The Meeting section above has the same switch for meetings, which Zoom leaves on for you.
Start the webinar again
If the webinar is already running, end it and start it again after changing the setting.
Troubleshooting
The app says it must be opened inside a Zoom meeting
The app can only start a session from within an active meeting. Join or start a meeting first, then open Maestra Live from the Apps button in the meeting toolbar.
A participant sees "Waiting for host"
Only the meeting host can start a captioning session. Once the host presses the red microphone button, the link appears in the chat and participants can paste it into their own panel to watch.
Captions are not appearing
Check that the panel shows Live Captions Active, that your Zoom account is still linked on the Meeting Integrations tab of Integrations in Maestra, that someone is speaking in the selected source language, and that you have enough Maestra credits. Opening the shared link on another device is a quick way to confirm captions are flowing.
Which language do viewers see?
In Transcribe mode, viewers see the spoken language. In Translate mode, they can pick any translation language you added (or the original) from the join page.
Can the captions go into Zoom's own caption bar?
Not from this app at the moment. Maestra's captions live in the app panel and on the shared link, where every viewer picks their own language. If you specifically need them in Zoom's built-in caption bar, see Zoom Closed Captions for the manual caption-token setup, which works without the Marketplace app.
Uninstall
Removing the integration takes two steps: unlink it in Maestra, then remove the app from Zoom.
Unlink in Maestra
Open Integrations from the left sidebar in Maestra, go to the Meeting Integrations tab, open the Zoom card, and click Remove Channel to unlink your Zoom account.
Remove the app from Zoom
Go to your installed Zoom apps, find Maestra Live - Transcription & Translation, and click Remove.